Advanced Deliberate Offset: Precision Palpation-Guided Injections at the Joint Line (Part 2)
Continuing from Part 1, I’m Dr. David Wang of RPI, extending the deliberate offset technique with a more advanced application near the joint line. This installment demonstrates how to apply the same stepwise, controlled progression to another anatomical context—emphasizing safety and precision when working with small targets and nearby structures.
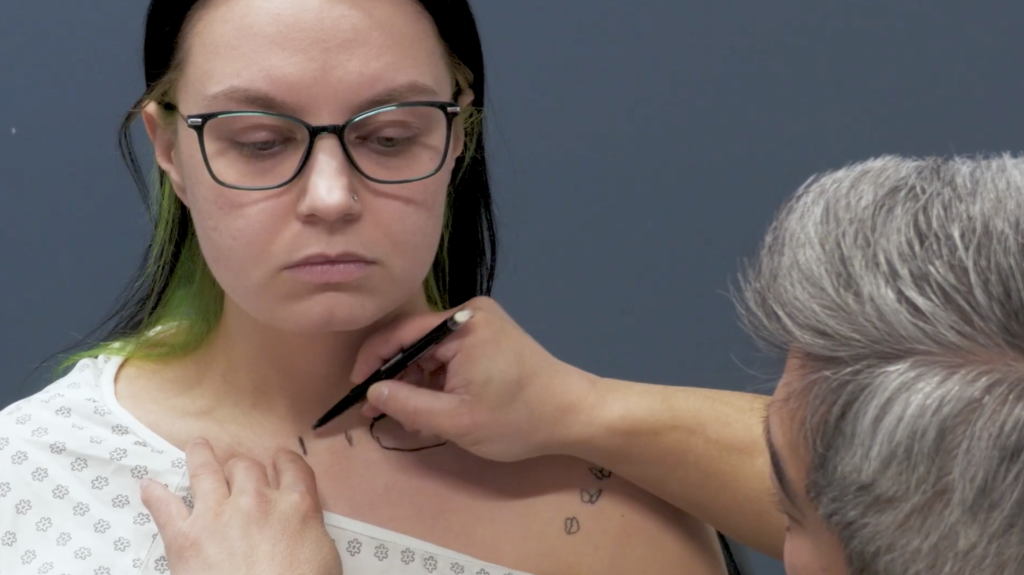
The premise remains the same: begin with a shallow entry to verify superficial anatomy, then incrementally deepen while maintaining a keen sense of needle depth and trajectory. In this example, the target is a small tibial structure just beneath the knee’s joint line. The medial joint line is a small, millimeter-scale target, often only a few millimeters long. Because the region houses several critical structures, accuracy is paramount, and image guidance is not always available in practice.
A crucial consideration is tissue thickness variability. The distance from skin to bone can range dramatically between patients, sometimes just a few millimeters and other times several centimeters. This variability makes it challenging to rely on a fixed depth or fixed degree-angle rule. Deliberate offset provides a flexible framework: you start superficially, progressively adjust depth and angle, and use tactile feedback—the “sonar” of the needle tip—to guide you to the target zone.
In this context, safety is the top priority. You’ll be navigating around structures such as the meniscus, cartilage, and fat pads. By offsetting initially and learning to feel when you’ve reached the correct layer, you minimize unnecessary needle passes and tissue trauma. The result is a safer, more efficient approach that can be adapted to various joints and targets beyond the shoulder.
If you’d like, I can format these posts for WordPress HTML blocks, add visuals, and provide a downloadable marking checklist to accompany the posts. And, as with Part 1, I’ll include an internal link back to Part 1 so readers can follow the full learning sequence.