Mastering AC Joint Landmarking for Shoulder Injections: Part 1 — Common Errors and Corrections
I’m Dr. David Wang from RPI, and I’m sharing a practical, clinician-focused guide to improve palpation-based landmarking for shoulder injections. This is Part 1 of a two-part series designed for orthopedic providers who want to translate palpable anatomy into accurate, safe injections around the clavicle and AC joint.
The shoulder region presents a challenging landscape for landmarks. The AC joint sits where the distal clavicle meets the acromion, but the superficial cues we rely on can be misleading. A frequent error I see is marking the sternoclavicular region or a lateral line in place of the true AC joint boundary. The sternoclavicular joint is near the sternal notch, a narrow landmark. When you place a line laterally across the shoulder to demarcate the AC joint, you risk overshooting medially or laterally, misaligning your subsequent injection plan. The sternal notch itself is relatively small, and it’s flanked by a clavicle that trails medially and laterally as it curves. Understanding this spatial relationship is essential for accurate injection targeting.
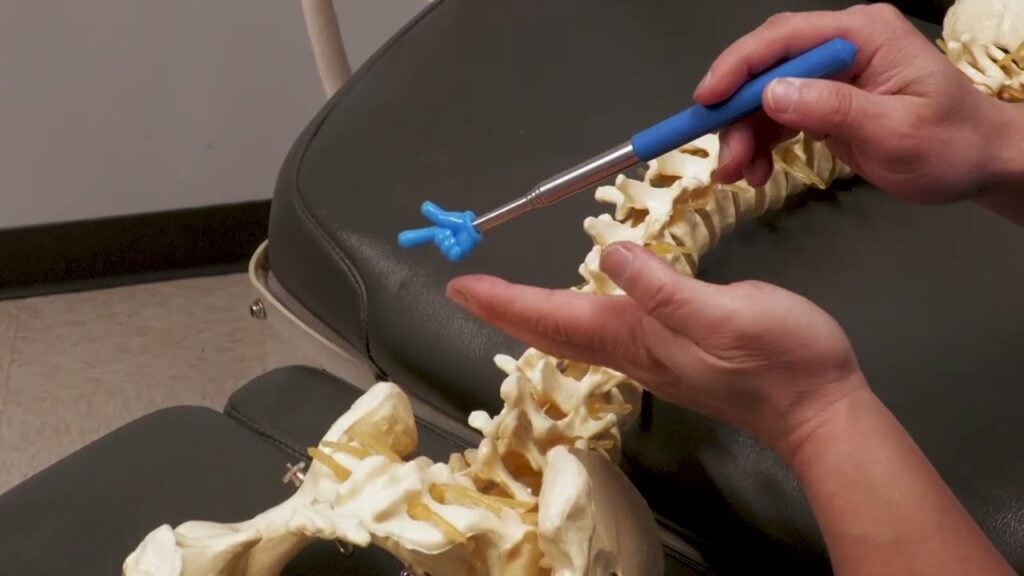
To avoid these missteps, I emphasize the concept of three divots around the AC area. The middle divot corresponds to the AC joint itself. The lateral divot marks the edge of the acromion, while the medial divot sits near the distal clavicle’s curvature. The challenge is that the distal clavicle is not a uniform edge; it has a subtle S-curve that transitions from a more cylindrical medial segment to a flatter distal segment. This curvature shifts the posterior border of the clavicle posteriorly, a detail that is easily masked by the trapezius muscle. If you rely on a straight-line approach to mark the clavicle, you’ll likely misplace the AC joint and, consequently, risk misdirecting your injection.
Another layer of complexity is distinguishing the coracoid process from the clavicle’s landmarks. The coracoid is a separate bony prominence, and confusing it with the medial clavicle can throw off your landmark map. Practically, I instruct residents and fellows to palpate with a purpose: identify the medial edge of the clavicle, then trace the clavicle’s S-curve toward the distal end, where it meets the V-shaped posterolateral corner. The V marks the termination of the clavicle and aligns with the AC joint line. This alignment is critical for planning injections near the superior labrum and adjacent structures.
With palpation alone, these landmarks can be elusive, particularly in patients with arthritic changes that alter bony margins. That’s why a robust mental map of distances helps: the midpoint of the AC joint is typically about two centimeters medial from the lateral edge of the acromion. This spatial rule of thumb provides a practical check when palpation feels uncertain. Even when the joint line isn’t easily palpable, knowing these relationships improves your odds of accurate injection localization.
In Part 2, we’ll move from landmark recognition to applying ultrasound guidance to refine our injections. We’ll describe a reproducible marking protocol that uses these landmarks, integrates with ultrasound visuals, and reduces tissue misplacement. If you’d like, I can tailor this content for a specific orthopedic subspecialty, or convert it into a workshop handout, diagram set, or printable marking checklist.