Author name: Eric Phillippi

Clinic Operations, Lower Extremity, Spine, Upper Extremity

Sharpening Ultrasound Skills for Spinal Injections: A Practical How-To for Providers

Sharpening Ultrasound Skills for Spinal Injections: A Practical How-To for Providers

Before you start scanning, clarify your goals. Identify the target anatomy for your planned injection—whether you’re aiming for the spinous process, lamina, facet joints, or transverse processes. Mapping out your needle trajectory and entry angles ahead of time helps you select the most appropriate transducer and scanning window. Establishing these parameters upfront sets the stage for a smoother, more precise procedure.

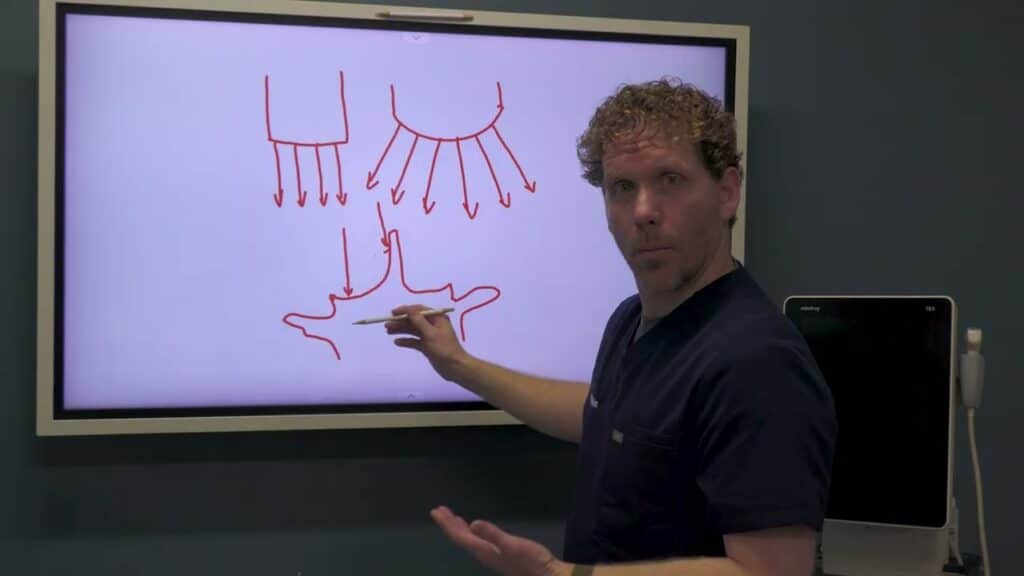
Transducer selection is central to this process. The curvilinear transducer, typically lower in frequency with a larger footprint, excels when target depth is a factor. For structures around five centimeters or deeper, it provides better penetration and a broader field of view, enabling you to visualize deep bony landmarks and the needle path with greater confidence. A key advantage of the curvilinear probe is its multi-angle sound-wave emission, which can improve visualization when you plan multiple needle angles during the injection.

By contrast, the linear transducer offers higher near-field resolution and is superb for superficial structures—roughly zero to four centimeters deep. It provides detailed visualization of the superficial bone cortex and soft tissue, which can be crucial for precise needle localization once the trajectory is established and the target lies within the near field. A practical approach is to start with curvilinear for depth and broad overview, then switch to linear for final needle advancement and fine-tuning in the near field.

Imaging the spinal cortex and landmarks benefits from understanding how the angle of insonation affects reflection. Perpendicular insonation yields the brightest reflections from cortical bone, so position the transducer to maximize perpendicular impact on the spinous processes, lamina, and facet joints. With a curvilinear probe, you can take advantage of multiple incident angles to enhance visualization of complex anatomy and to track the needle when approaching from multiple directions. If you encounter artifact or shadowing, a small adjustment in angle or a gentle rock of the probe can optimize reflections from the cortical bone.

Transducer selection is more than a procedural backdrop; it’s a lever that can meaningfully improve accuracy, safety, and efficiency. By understanding the trade-offs between curvilinear and linear probes and applying deliberate imaging strategies, clinicians can elevate their ultrasound-guided spinal injections and deliver better patient care.


Sharpening Ultrasound Skills for Spinal Injections: A Practical How-To for Providers Read Post »
Clinic Operations

Maximizing Regenerative Injectables: Why Post-Procedure Physical Therapy Matters

Maximizing Regenerative Injectables: Why Post-Procedure Physical Therapy Matters

I’m Dr. Eric Phillips of RPI, and I want to share a practical, patient-focused approach to regenerative medicine. In my view, the success of regenerative injections—whether prolotherapy, PRP, or stem cell treatments—depends as much on what happens after the procedure as on the procedure itself.

My core message is simple: after a regenerative injection, I aim to place patients into a structured physical therapy program within about a week. The rehab protocol I use is tailored to the specific area we’re treating—whether it’s a spine injection, a shoulder, a peripheral joint, or another region. The goal is to guide the body’s remodeling process through targeted therapy that complements the regenerative work we’ve done.

I don’t have in-house physical therapists in my practice, but I’ve built a strong network of skilled PT partners throughout the community. I educate these therapists about my protocols and frequently refer patients to them, while collaborating closely with their teams. This network creates a seamless continuum of care and ensures patients receive consistent, high-quality guidance throughout their rehab journey.

I talk to patients about the synergy of regenerative injections with physical therapy, describing it as a “one plus one equals three” dynamic. When rehab reinforces tissue remodeling and functional recovery, we’re more likely to achieve optimal outcomes. I also frame the rehab plan in terms of what patients have already invested—time, money, and discomfort—so I encourage them to stack the deck in their favor by committing to comprehensive post-procedural care.

Practically speaking, I advise clinicians to build relationships with local physical therapists, invite them into the practice ecosystem, and even host meetings or joint visits. A well-established PT network can reliably support patients before and after injections, which translates into stronger patient confidence, measurable progress, and higher satisfaction at follow-up visits.

If you’re considering regenerative treatments, I hope this approach helps you see why post-procedural rehabilitation is a critical component of success. A thoughtful rehab plan, backed by a trusted PT network, can significantly enhance outcomes.

Maximizing Regenerative Injectables: Why Post-Procedure Physical Therapy Matters Read Post »

lumbar spine mechanics
Spine

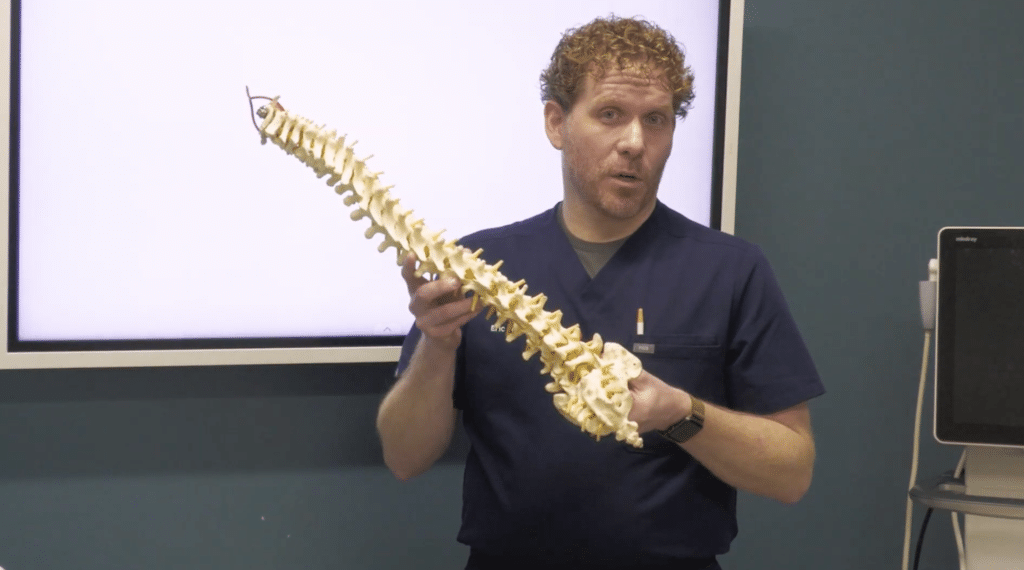
Lumbar Biodynamics for Orthopedics: Posterior Stabilization with Ultrasound-Guided Injections

Lumbar Biodynamics for Orthopedics: Posterior Stabilization with Ultrasound-Guided Injections

I’m Dr. Eric Philippi of RPI, and I want to share a biomechanically informed perspective on the lumbar spine and how targeted injections can support posterior stability. This article is written for orthopedic providers—spine fellows, sports medicine specialists, interventional pain physicians—who want to translate lumbar biomechanics into actionable clinical practice.

The lumbar functional unit is more than a stack of vertebrae; it’s a dynamic system where each level interacts with the one above and below through vertebral bodies, discs, lamina, facet joints, and the posterior ligaments. In this context, biodynamics and the concept of “biotensegrity”—the posterior elements acting as stabilizers—offer a practical framework for understanding pain generators and guiding interventions.

A useful way to think about this is via the fulcrum analogy. The facet joints act as a central pivot, with the lamina and posterior ligaments providing stabilizing support. When posture deteriorates, repetitive strain, or acute trauma loosens these ligaments, the load distribution shifts. The result can be accelerated disc degeneration, facet arthropathy, and nerve irritation. My approach is to restore stability by delivering precise injections that reinforce the posterior spine and reduce mechanical stress on the discs and nerve roots.

In practice, I emphasize a targeted posterior approach under ultrasound or palpation guidance. The goal is to tighten and stabilize the posterior ligaments and elements to restore a more physiological lumbar lordosis and to relieve forward-directed pressure on the discs. By stabilizing the posterior aspects, we can potentially mitigate nerve compression and facet-related pain while preserving mobility. This is not about a one-size-fits-all solution; it’s about identifying which posterior structures contribute to instability in a given patient and choosing an injection strategy that addresses those components.

Ultrasound guidance plays a central role in this plan. It enhances our ability to visualize posterior spinal structures, confirm needle trajectory, and ensure accurate deposition around ligaments and joints. With ultrasound, we can verify that our target is reached without compromising nearby neural structures. The practical takeaway is to map the spine’s alignment, identify the posterior stabilizers, and then deliver a targeted injection that supports the spine’s natural biomechanics.

In designing a treatment course, consider how biodynamics informs patient selection. Patients with recurrent episodes of facet-related pain, subtle sagittal imbalance, or segmental instability may benefit from a posterior stabilization strategy. The injections themselves can help restore proprioceptive feedback and reduce inflammatory signaling within the posterior elements, potentially decreasing pain and improving function. That said, the success of this approach hinges on careful patient selection, precise technique, and thoughtful integration with rehabilitation.

A primer on this approach is also a reminder that biomechanics should inform not only injections but the broader care pathway. Imaging findings must be interpreted in the context of standing and dynamic spinal mechanics. When planning injections, I assess global alignment, segmental stability, and the contribution of posterior ligaments to load transfer. I view the spine as a cohesive unit, where restoring posterior stability can reduce strain on the discs and facets and support a more favorable healing environment.

As we prepare for ongoing education and conference discussions—such as insights into the biodynamics of the lumbar spine—this framework helps translate theory into practice. If you’re an orthopedic provider, consider how a biomechanical lens—focusing on stabilizing the posterior spine—might refine your patient selection, injections, and rehabilitation plans. It’s not only about relief of pain; it’s about restoring functional biomechanics to preserve mobility and quality of life.

Lumbar Biodynamics for Orthopedics: Posterior Stabilization with Ultrasound-Guided Injections Read Post »

Business, Clinic Operations

Consultation to Recovery: Setting Clear Expectations for PRP and Regenerative Therapies

Consultation to Recovery: Setting Clear Expectations for PRP and Regenerative Therapies

Setting realistic expectations for regenerative injections is a practical, patient-centered approach that can significantly improve satisfaction and outcomes. I’ve found that the way we frame conversations with patients before a PRP or stem cell procedure sets the tone for the entire recovery journey. 

A simple, honest framework makes a big difference: I share the average worst-case scenario during the consultation so patients aren’t surprised by what’s typical. In my practice at RPI, I often see patients experience four to seven days of discomfort after a procedure—soreness, stiffness, and limited mobility. By acknowledging this up front, I help patients understand that initial post-procedure discomfort is common and not a sign that the treatment has failed. I also discuss the possible need for nighttime pain medications to sleep, while clarifying that the pain is usually related to the recovery process rather than the underlying condition being treated. This transparency helps reduce anxiety and builds trust, which is crucial for adherence to post-procedure care.

Equally vital is outlining a clear post-procedure plan. After the regenerative injection, I guide patients into a structured rehabilitation protocol, with physical therapy typically starting within a week and a dedicated rehab coach to walk them through the process. I explain the availability of supportive modalities—peri-neural injection therapy, shockwave therapy, and red light therapy—to give patients a tangible sense of the tools that will aid their recovery. The overarching goal remains improved function and reduced pain in the long term, even if the early days feel worse. To minimize disruption and optimize outcomes, I advise patients to limit travel, strenuous activity, and other demanding tasks during the initial weeks, and to plan recovery around lighter schedules. Building a network of trusted physical therapy providers not only supports each patient’s rehab but also strengthens referrals and collaboration within the care team.

I recognize that patient experiences vary; some may notice rapid improvement, while others progress more gradually. However, providing a consistent, evidence-informed framework reduces uncertainty and improves adherence to the rehabilitation plan. A practical takeaway is to offer a one-page handout that outlines what to expect before and after the procedure and to schedule a brief follow-up within a week post-procedure to address questions and adjust the rehab plan as needed. By centering conversations on transparent expectations, clear timelines, and coordinated care, we can help patients achieve the best possible outcomes from regenerative injections.

Consultation to Recovery: Setting Clear Expectations for PRP and Regenerative Therapies Read Post »

Clinic Operations

The Surprisingly Perfect Skin-Marking Pen for Prolo & PRP (Yes, It’s an Eyeliner)

The Surprisingly Perfect Skin-Marking Pen for Prolo & PRP (Yes, It’s an Eyeliner)

Hey—it’s Dr. Phillippi with RPI. Quick, practical tip you can use on your very next injection day: the humble skin-marking pen. When I’m planning prolotherapy or PRP, I always start with palpation. I mark bony landmarks and key reference points directly on the skin, then confirm and refine with ultrasound. That simple step does two things: it sharpens my targeting on screen and it improves the patient’s experience—because they can see the plan before we ever pick up a needle.

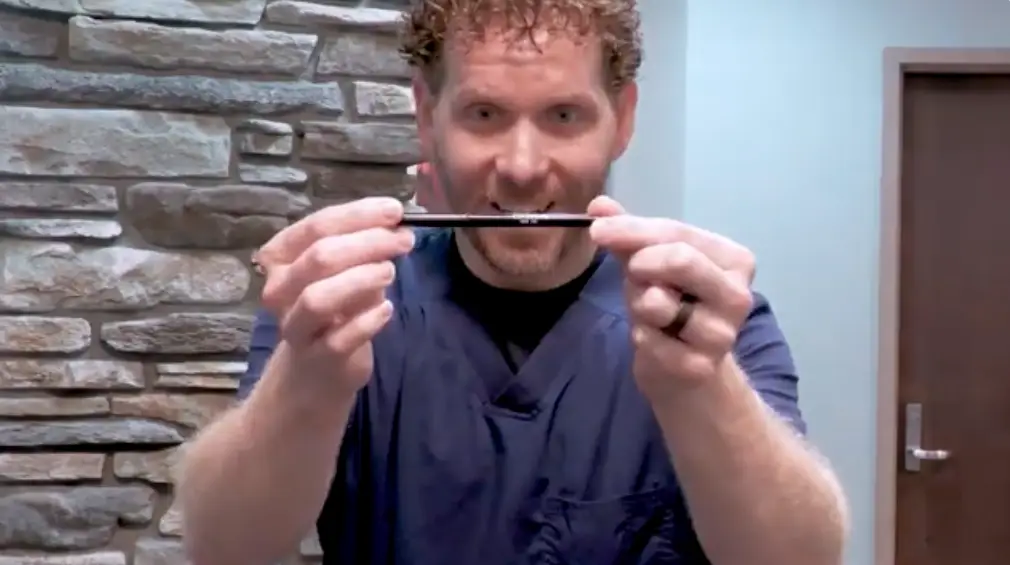
After trying a dozen options (I literally visited a beauty supplier and sampled every eyeliner they’d let me test), one pen rose to the top: CoverGirl Ink It! Eyeliner, Black #230. Here’s why it’s become my go-to.

1) High-contrast, stays visible
Black ink reads clearly against most skin tones and pops on camera if you’re teaching. Clarity matters when you’re triangulating your palpation line with your probe orientation and needle path. With this pen, the mark is unmistakable.

2) Survives skin prep
I don’t inject through the inked spot—ever—but I do prep the field with chlorhexidine and alcohol. Many markers disappear the moment you prep; this one doesn’t. The line holds through aseptic prep so your reference stays intact while you work around it.

3) Durable, clinic-friendly design
It’s a gel-style mechanical eyeliner. That means no sharpening, less mess, and fewer broken tips. Keep the extension short and it’s surprisingly tough. There’s plenty of product in the barrel, so a pen lasts far longer than you’d think (even in a busy clinic).

4) Patient expectations are easy to manage
Because it’s designed to stay, I give patients a quick heads-up: some marks may linger for several days. A standard makeup remover will take it off faster. If you’re seeing them the next week, don’t be surprised if a faint line is still present—it’s a feature, not a bug.

5) It complements palpation-first technique
For me, palpation is the foundation: PSIS to iliac crest, fibular head to Gerdy’s tubercle, patellar and tibial landmarks—mapped before the probe comes out. The mark anchors my mental model, the ultrasound refines the target, and the needle path gets executed with confidence. That sequence keeps the work precise and repeatable.

Practical pointers

  • Mark your bony landmarks first; keep your injection target adjacent to, not through, the ink.
  • Prep as usual—your marks should remain readable.
  • Reconfirm depth and trajectory with ultrasound before you start.
  • Document your landmarks in the note; patients appreciate the extra clarity.

A quick note on skin sensitivity
This is a beauty-industry product, used here in a medical workflow. Test on a small area first if your patient has sensitive skin or known reactions to cosmetics. As always, follow your clinic’s protocols and scope of practice.

Bottom line: if you want crisp, reliable skin marks that survive prep and make both ultrasound and patient communication easier, CoverGirl Ink It! Black #230 is a small upgrade that pays off big. I’ve tried them all—this is the one I keep going back to. Give it a shot on your next clinic day and see if it tightens up your process as much as it did mine.

The Surprisingly Perfect Skin-Marking Pen for Prolo & PRP (Yes, It’s an Eyeliner) Read Post »

Clinic Operations, Nerves

Ultrasound Depth Settings for Safer, Cleaner Injections

Ultrasound Depth Settings for Safer, Cleaner Injections

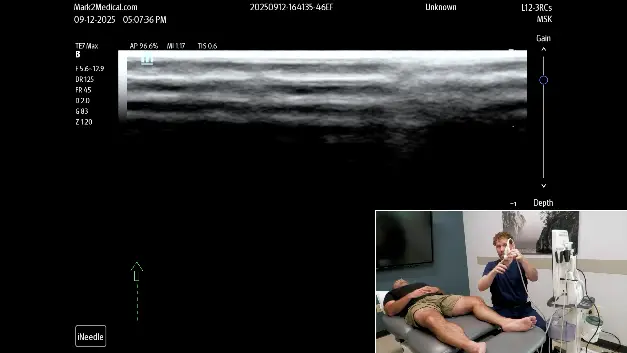
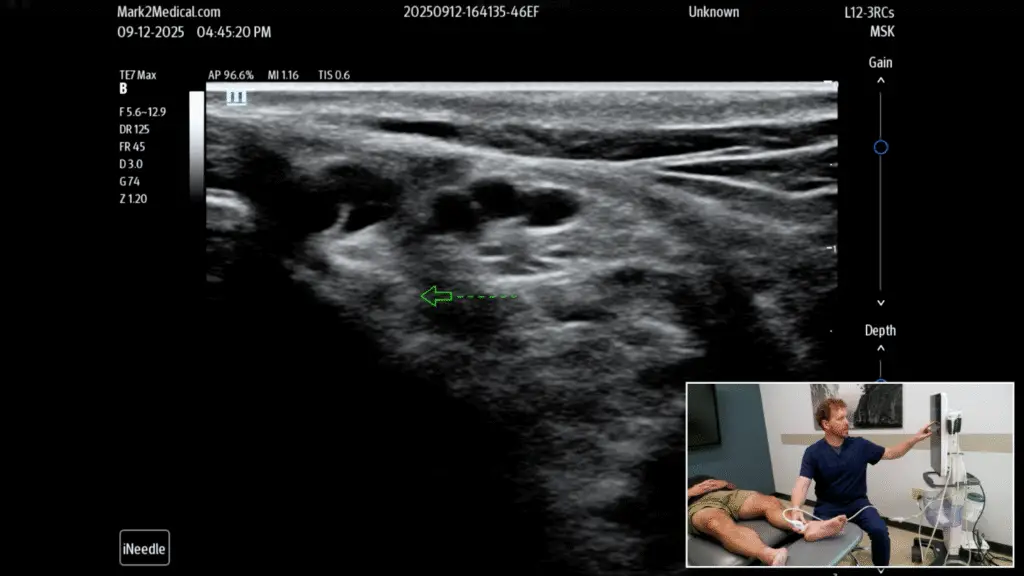
Depth is one of the first—and most important—settings to optimize when performing ultrasound-guided injections. Set it too shallow and you’ll lose critical lateral information; too deep and you sacrifice resolution. Here’s a simple, repeatable approach using the medial ankle (posterior tibial nerve at the medial malleolus) to get your depth right before you ever pick up a needle.

Why Depth Matters

On many machines, changing depth doesn’t just alter how far you see—it also changes how much of the probe footprint is represented on screen. With overly shallow depth, the image can stop reflecting the full lateral edges of the transducer. That creates a dangerous mismatch: you think the screen shows “everything under the probe,” but the true footprint extends beyond what’s visible. Result: a needle can travel off-screen (e.g., toward the Achilles) even though it’s still beneath the probe.

The Setup: Medial Malleolus Window

Short-axis view between the medial malleolus (bone/cortical shadow) and Achilles tendon:


      • Identify posterior tibial artery and paired veins (veins collapse with gentle compression; artery stays patent/pulsatile).

      • Find the posterior tibial nerve (oval/round, honeycomb fascicles with hyperechoic epineurium).

      • If there’s an air gap between malleolus and Achilles, flood the space with gel (standoff) rather than pressing harder.

    The Depth Drill (Before You Inject)


        1. Start shallow, then watch the left/right edges of the image as you step the depth deeper one click at a time.

        1. Confirm full footprint capture: As you increase depth, there’s a point where the image gets wider (more of the probe footprint is now represented). Keep stepping deeper until additional depth no longer widens the image—then back off one click so you maintain resolution while still visualizing the entire footprint.

        1. Landmarks visible: At your working depth, you should see the medial malleolus cortex, Achilles margin, artery/veins, and the tibial nerve—all within the on-screen field.

        1. Angle of approach: If your injection is in-plane from posterior → anterior, confirm that the entry corner of the probe corresponds to on-screen edge. With full-footprint visualization, your needle should appear as soon as it passes the skin and remain visible to the tip.

      Safety Pearls


          • Never chase a missing needle by advancing blindly. If the tip disappears, stop, re-optimize depth/angle, and re-approach.

          • Use anisotropy to brighten the nerve (tilt the transducer a few degrees in either direction).

          • Hydrodissect with a small test bolus to confirm perineural spread; avoid intraneural resistance or swelling.

          • Machine-specific sweet spot: On some systems, that “full-footprint” depth might be ~2.5–3.0 cm for this ankle window. Test on your unit (and each probe) so you know the threshold before procedures.

        Common Pitfalls


            • Too shallow: Great nerve detail but truncated lateral field—needle can go off-screen under the same probe.

            • Too deep: Entire footprint visible, but resolution suffers and small targets are harder to see.

            • Over-compression: Distorts tissue, collapses veins, and hides the plane you intend to inject.

          Bottom Line

          Pick a depth that captures the full probe footprint while preserving enough resolution to track the needle tip. Do this first, every time, and your injections will be safer, cleaner, and more predictable.

          Ultrasound Depth Settings for Safer, Cleaner Injections Read Post »

          Lower Extremity, Nerves

          Medial Ankle Ultrasound: Finding the Tibial Nerve Behind the Medial Malleolus

          Medial Ankle Ultrasound: Finding the Tibial Nerve Behind the Medial Malleolus

          When you’re scanning the medial ankle for tibial nerve pathology—or planning a guided injection—small imaging tweaks make all the difference. Here’s a fast, practical roadmap to optimize contact, identify vessels, and reliably bring the tibial nerve into view between the medial malleolus and Achilles tendon.

          Quick Anatomy & Landmarks

          The tibial nerve (sciatic branch) courses deep in the posterior compartment, then becomes more superficial in the tarsal tunnel posterior to the medial malleolus before branching into plantar nerves in the foot. Your target window: the soft-tissue corridor between the medial malleolus and Achilles.

          Probe Contact: Fix the “Air Gap”

          This region often traps air between the probe, malleolus, and Achilles—creating a black “dead space” with no signal.

          • Solution: Don’t just press harder (it hurts and can distort tissue). Instead, flood the gap with gel to create a gentle standoff. On screen, expect a superficial hypoechoic (dark) gel layer above the skin line. Maintain light, even pressure.

          Orientation & Setup

          In a standard short-axis view:

          • Left of screen = anterior, right = posterior.
          • Identify bone contours (malleolus), the Achilles laterally, and the soft-tissue tunnel in between.

          Vessels First: Artery vs Veins

          You’ll typically see one or more round, anechoic structures adjacent to the nerve.

          • Compression test: Veins “wink” (collapse) with gentle pressure; the artery remains patent and may pulsate. (Color/power Doppler can help if needed—use low wall filters and appropriate gain.)

          Find the Tibial Nerve: Use Anisotropy

          Peripheral nerves have a fascicular (“honeycomb”) look: hypoechoic fascicles within a hyperechoic epineurium. If you can’t see it:

          • Tilt the probe a few degrees. Because of anisotropy, nerves brighten when insonated perpendicularly and dim at oblique angles—same footprint, different angle, drastically different visibility.
          • Tilt slowly until a bright, oval/round, honeycomb structure appears adjacent to the artery/veins.

          Safety Tips for Guided Injections

          • Plan your path in-plane with clear visualization of needle tip at all times.
          • Hydrodissect with a small test injectate to confirm spread around (not within) the nerve.
          • Stay perineural, not intraneural—avoid nerve swelling or “cord-like” resistance.
          • Respect the posterior tibial artery/veins; confirm identity and keep the needle trajectory away from them.
          • If image quality drops, re-add gel, re-optimize depth, focus, and re-rock for anisotropy.

          Common Pitfalls

          • Pressing too hard: collapses veins, distorts anatomy, and obscures the nerve.
          • Chasing a dark nerve: at an oblique angle, the nerve can “disappear.” Fix the angle before moving the probe.
          • Mislabeling tendons: tendon fascicles can mimic nerves; confirm by dynamic movement (tendon glides), while nerves remain relatively static.

          Clinical Takeaway

          Mastering contact (gel standoff), vessel confirmation, and anisotropy turns a tricky medial ankle scan into a predictable, safe procedure. Get perpendicular, find the artery/veins, light up the tibial nerve, and proceed with confidence.

          Medial Ankle Ultrasound: Finding the Tibial Nerve Behind the Medial Malleolus Read Post »

          Lower Extremity

          The Step-by-Step Knee Physical Exam: A Practical Guide

          The Step-by-Step Knee Physical Exam: A Practical Guide

          A structured knee exam helps you pinpoint the true driver of pain—whether it’s articular, ligamentous, meniscal, or neuro-myofascial. Below is a concise, repeatable sequence you can use in clinic.

          1) Standing Inspection (Anterior & Posterior)

          Start with the patient standing, feet shoulder-width and facing forward.

          • Quadriceps & patella: Compare quad bulk and tone. Check patellar height and tilt; note “patellar squinting” (inward tilt) or asymmetry.
          • Foot mechanics: Quickly assess arch integrity. A simple index-finger “arch check” at the medial sole helps screen for overpronation.
          • Posterior view: Inspect calf (gastroc) bulk, Achilles alignment, popliteal fossa fullness (possible effusion/Baker’s cyst). From behind, excessive lateral toe sign (>3 toes visible) suggests overpronation that can transmit stress proximally to the knee.

          2) Supine Inspection & Effusion Assessment

          With the patient supine:

          • Skin & swelling: Look for erythema, warmth, and postoperative scars.
          • Effusion: “Milk” fluid from the suprapatellar pouch into the joint, then ballot for a fluid wave medial ↔ lateral between patella and femoral condyles.

          3) Palpation Map

          Progress from least to most provocative to minimize guarding.

          • Patellofemoral joint: Patellar grind (compress patella into the trochlear groove as the patient contracts quads). Palpate around patellar margins and along the patellar tendon to the tibial tuberosity. Re-palpate with the knee flexed—symptoms may localize only when the tendon is taut. Screen for infrapatellar bursitis with targeted tenderness medial/lateral to the tendon.
          • Joint lines: Palpate the medial and lateral joint lines for meniscal and chondral tenderness (use the inferior pole of the patella and knee crease as guides). In known severe medial OA, consider saving this for last to avoid guarding.
          • Posterior knee: Palpate the popliteal fossa for fullness (Baker’s cyst).
          • Nerve & tendon entrapment points: Check anterior femoral cutaneous points over the distal quad; superior medial/lateral genicular regions at the femoral flare; pes anserine (tendons/bursa) at the medial tibial flare; IT band and Gerdy’s tubercle laterally. Track the saphenous nerve from Hunter’s (adductor) canal to the medial leg and the infrapatellar branch anterior to the tibia.

          4) Range of Motion

          Measure active extension (hyperextension if present) and flexion (heel to glute), then repeat passively. Compare bilaterally and document degrees.

          5) Ligament Testing

          • MCL/LCL: At ~15° flexion, apply valgus (MCL) and varus (LCL) stress. Note pain and end-point quality (firm vs lax).
          • ACL (Lachman/anterior drawer): Lachman at ~15° flexion with proper tibial plane alignment (don’t pull straight up; follow tibial plane). Anterior drawer at ~90° with the foot anchored—limit jostling to appreciate translation.
          • PCL (posterior drawer/posterior sag): Look for a sulcus sign (posterior tibial drop). Compare tibial plateau position relative to femoral condyles.

          6) Meniscal Testing

          • McMurray:
            • Medial meniscus: Varus/valgus set-up—grasp medial joint line, apply valgus and external tibial rotation during flexion/extension; feel for clicks/clunks or reproduced pain.
            • Lateral meniscus: Palpate lateral joint line, apply varus and internal rotation during flexion/extension; assess for mechanical symptoms.

          Clinical Pearls

          • Sequence matters: start global → local; save the most provocative palpation last.
          • Foot/ankle mechanics (overpronation) often mirror knee load patterns—note and address in the plan.
          • Document bilaterally for true side-to-side comparisons.

          The Step-by-Step Knee Physical Exam: A Practical Guide Read Post »

          Lower Extremity, Nerves

          Differentiating Medial Knee Pain: Infrapatellar Saphenous vs. Inferior Medial Genicular Nerves

          Differentiating Medial Knee Pain: Infrapatellar Saphenous vs. Inferior Medial Genicular Nerves

          Medial knee pain is common in patients with osteoarthritis, ligamentous instability, and postoperative or overuse syndromes. Two frequent—but often conflated—pain generators live in the same neighborhood: the infrapatellar branch of the saphenous nerve (IPS) and the inferior medial genicular nerve (IMGN). Understanding how to find and treat each one can significantly improve outcomes.

          Quick Anatomy Review

          • Saphenous nerve & IPS branch: The saphenous nerve originates from the femoral nerve and travels through Hunter’s (adductor) canal, providing cutaneous sensation along the medial knee, calf, and ankle. The infrapatellar branch is a small, recurrent sensory branch that innervates the anteromedial infrapatellar region—superficial, within subcutaneous fascial planes above the pes anserine tendons and superficial to the MCL.
          • Inferior medial genicular nerve (IMGN): A capsular branch accompanying the inferior medial genicular artery, curving around the medial tibial flare to innervate the inferomedial joint capsule. It sits deep to the MCL, adjacent to the tibial cortex.

          Why They’re Easy to Confuse

          Patients often report focal tenderness over the medial tibial plateau/infrapatellar area, where both IPS (superficial, cutaneous) and IMGN (deep, capsular) converge clinically. Palpation alone can be inconclusive; you may elicit tenderness over the pes anserine region, MCL, or along the saphenous track to the medial malleolus without confidently assigning the driver.

          Ultrasound Roadmap

          1. Landmarks: Place the probe over the medial tibial plateau. Identify the tibial cortex as a bright hyperechoic line (the tibial flare). Superficial to cortex, you’ll visualize the MCL with linear fibrous architecture; superficial to the MCL are the pes anserine tendons.
          2. Find the IMGN (via its artery): Activate power Doppler and look for the inferior medial genicular artery at the tibial flare, just deep to the MCL. Adjust Doppler gain high enough to catch small-vessel flashes (too low and you’ll miss it; too high and you’ll get speckle). The nerve tracks with the artery—you may not always visualize the nerve, but the artery is your beacon.
          3. Locate the IPS branch: Scan superficial subcutaneous fascial planes over the anteromedial infrapatellar region, above pes anserine and the MCL. The IPS lies in these planes as small hypoechoic fascicles within the fascia.

          Treatment Strategy: Layer by Layer

          • Superficial (IPS): For cutaneous, burning, or pinpoint medial infrapatellar tenderness, perform perineural hydrodissection of the IPS within the subcutaneous fascial planes. D5W (5–10 mL) is commonly used to separate fascial layers and down-regulate the irritated branch.
          • Deep (IMGN): For capsular, “inside the joint” ache with focal tenderness at the tibial flare, target the IMGN deep to the MCL, again using hydrodissection (≈5 mL D5W) around the artery-nerve bundle. This can reduce intra-articular–type pain and relieve entrapment at the capsular margin.
          • Adjuncts: Track tenderness along the saphenous route (Hunter’s canal to medial malleolus) to identify broader saphenous involvement. Combine with standard OA and instability care plans as indicated.

          Clinical Takeaway

          Think in layers: superficial cutaneous pain suggests IPS; deep capsular pain points to IMGN. Use ultrasound landmarks (tibial cortex → MCL → pes anserine) and power Doppler to confidently identify the IMGN via its artery, and treat each plane with targeted hydrodissection. Precise diagnosis plus minimally invasive perineural techniques can meaningfully improve medial knee outcomes.

          Differentiating Medial Knee Pain: Infrapatellar Saphenous vs. Inferior Medial Genicular Nerves Read Post »

          Scroll to Top