Filter posts by category

Spine

Treating low back pain
Spine

How to Approach the Lumbar Spine: A Practical Guide for Diagnosing and Treating Low Back Pain (Part 1)

How to Approach the Lumbar Spine: A Practical Guide for Diagnosing and Treating Low Back Pain (Part 1)

When a patient arrives with low back pain, the goal is clear: identify the pain generators and assemble a treatment plan that reduces pain, improves function, and preserves the health of the structures involved. In this guide, I’ll walk through a practical framework you can apply in clinic, with a focus on anatomy, diagnostics, and a stepwise approach to treatment that includes conservative care, injections, and regenerative techniques.

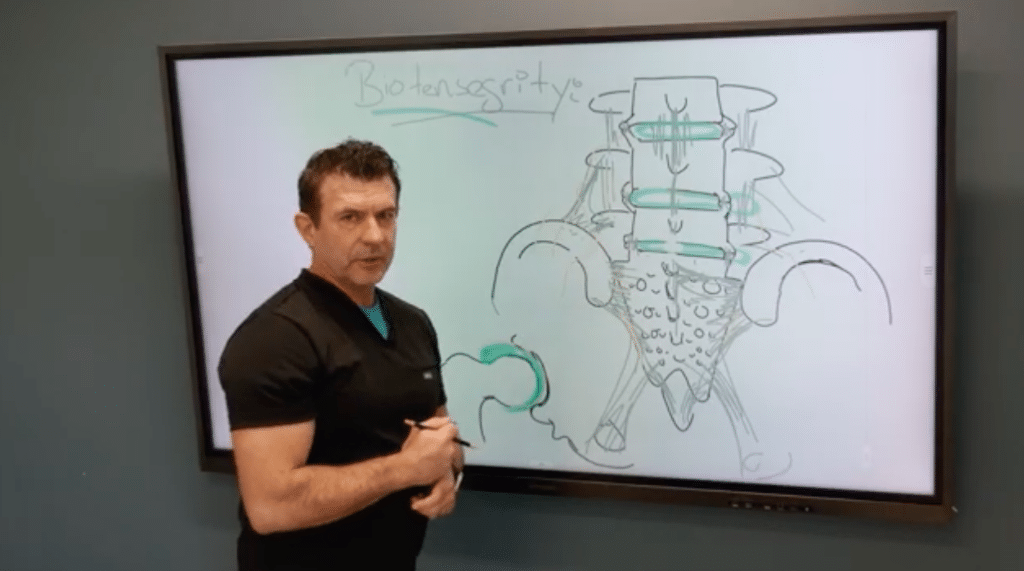
First, anchor your assessment in a solid understanding of the lumbar–sacral complex. The spine is a stack of bones with joints between them, stabilized by a network of ligaments and a surrounding joint capsule. Visually, imagine bone–disc–bone–disc along the lumbar spine, with the sacrum and ilia completing the pelvic connection. The ligaments act like a structural “duct tape,” holding the joints together and guiding movement. This integrative view matters because pain rarely comes from a single structure; it often reflects the interplay of bones, discs, ligaments, and the joints they form.

A critical hotspot to assess is the L5–S1 transition. This junction bears a lot of biomechanical and loading stress, and it’s a common source of wear, instability, and pain. L5–S1 stability depends on a robust set of ligaments, and in this region you’ll often find that the ligamentous anatomy is thinner or less robust, making the area particularly vulnerable to degeneration and inflammatory changes. When evaluating this segment, pay attention to the disk space as well as the surrounding ligamentous attachments. MRI and radiographs can reveal degenerative changes, but the clinical picture—where the patient feels pain, what movements provoke it, and what reproduces symptoms—will guide your next steps.

Beyond the L5–S1 junction, the sacral–iliac region (the SI joints) and the posterior pelvic ligaments deserve careful attention. The sacrum hosts a network of short and long ligaments that connect the ilium to the sacrum and provide both stability and subtle mobility. When you’re parsing pain in this area, consider the short sacroiliac ligaments that attach along the ilium and sacral crests, as well as the deep interosseous ligaments that act as some of the strongest stabilizers in the pelvic ring. These ligaments can be underdiagnosed as contributors to axial low back pain, yet ultrasound and targeted injections can reveal their involvement and offer therapeutic options.

Ultrasound and dynamic testing become powerful tools once you’ve identified the ligamentous landscape. With appropriate imaging, you can visualize attachment sites and guide injections to stabilize specific ligaments or ligament complexes. A practical approach is to map the bony landmarks (such as the sacral crests, spinous processes, and tubercles) and then correlate these with palpable and ultrasound-visible ligament orientations. The goal is to restore stability to the posterior elements so that the joints move with controlled, less painful mechanics.

Treatment, in practice, is multimodal. Start with conservative measures—physical therapy to improve strength and flexibility, activity modification, and bracing when indicated. If conservative measures don’t yield sufficient relief, consider targeted interventions such as nerve blocks or epidurals to break the pain cycle and enable rehabilitation. Finally, for patients with focal ligamentous instability or degenerative changes where traditional therapies fall short, regenerative procedures that target joints, ligaments, fascia, and muscle–tascue interfaces can offer meaningful improvements in pain and function. The unifying theme is to tailor strategies to the patient’s unique anatomic and biomechanical profile, not to rely on a one-size-fits-all protocol.

As you expand your practice, you’ll develop a more nuanced sense of which structures to test and treat first. The more proficient you become at recognizing the ligamentous architecture and its role in stability, the more precise your injections, blocks, and rehabilitative plans will be. With careful assessment and a thoughtfully staged treatment plan, you can help patients achieve durable reductions in pain and meaningful gains in function.
How to Approach the Lumbar Spine: A Practical Guide for Diagnosing and Treating Low Back Pain (Part 1) Read Post »

Beyond the Disc: Understanding the Neurologic Overlay in Low Back Pain
Nerves, Spine

Pelvic Nerves and Ligaments in Lower Back Pain: Understanding Entrapment and Relief Strategies (Part 2)

Pelvic Nerves and Ligaments in Lower Back Pain: Understanding Entrapment and Relief Strategies (Part 2)

Lower back pain is a common and complex symptom with many potential drivers. Among these, the pelvic-lumbar region harbors a network of ligaments and nerves that can influence pain patterns even when the discs or joints appear non-acute. Understanding how these structures interact helps clinicians and informed patients approach assessment and relief in a more targeted and safe way. This post offers a practical framework for recognizing how pelvic ligaments and nerves may contribute to pain, what non-invasive assessments can reveal, and how to discuss safe, evidence-based strategies with a clinician.

Anatomy and Stability

Ligaments and Pelvic Support The spine is stabilized by a lattice of ligaments and connective tissues that connect the spine to the pelvis. In the lower back, several ligaments play key roles in maintaining alignment and supporting movement. The interspinous and intertransverse ligaments, along with the iliolumbar ligaments, help stabilize the lumbar region and connect to the sacrum and iliac bones. A family of pelvic ligaments known as the C ligaments adds to this complex network. Short and long fibers blend with surrounding tissues, contributing to overall pelvic stability. When instability or tightness arises, these structures can influence pelvic mechanics and potentially affect nearby nerve pathways. This is not to suggest every pain arises from these ligaments, but recognizing their role can broaden your diagnostic and therapeutic options.

Nerve Entrapment

How Pain Can Emerge A useful way to think about back and pelvic pain is to consider nerves that traverse the pelvis and lumbar region. As nerves exit the spine and pass near ligaments and bony landmarks, they can become irritated if tissues shift or stiffen. A representative pathway involves a nerve that travels near the iliac crest and crosses pelvic ligaments as it courses toward the buttock and thigh. When surrounding tissues or joints rotate or become stiff, these nerves may experience tension or compression, leading to pain that radiates or feels burning, sometimes with numbness or tingling. Clinically, researchers and clinicians look for pain reproduction with palpation over the iliac crest and particular ligament regions, and they consider whether targeted interventions might relieve nerve irritation while protecting overall safety and function.

Assessment and Safe Considerations

A practical assessment approach emphasizes non-invasive, collaborative exploration with a clinician. Start with careful palpation around the iliac crest and sacroiliac region to identify focal tenderness. Observe movement for signs of abnormal pelvic rotation or instability, as these patterns may correlate with nerve irritation. A neurologic screening helps distinguish nerve-related signs from other sources of pain. It’s important to emphasize that this overview is educational and not a substitute for professional diagnosis. If you’re experiencing persistent back or pelvic pain, seek a qualified clinician who can perform a comprehensive evaluation, including physical examination and, when appropriate, imaging or diagnostic tests.

Treatment Concepts and Cautions

In the context of pelvic instability and nerve irritation, treatment goals focus on safety, symptom relief, and restoring healthy function. A clinician might discuss strategies to reduce nerve irritability and local inflammation while avoiding procedures that are not indicated. Any approach should be tailored to the individual’s health status, activity goals, and risk factors, with careful consideration of consent, safety, and evidence-based practice. Educational conversations with patients should cover what to expect, potential risks, and the rationale for each recommended step. The aim is to support informed decision-making and a shared plan of care rather than a single “cure.”

Takeaways for Patients and Clinicians

The pelvic ligaments and nerves contribute to a complex picture of lower back and pelvic pain. Nerve irritation can arise from mechanical instability, joint changes, or ligament tightness, and a careful, evidence-based assessment guides safe, individualized treatment. Collaboration among clinicians, therapists, and patients improves outcomes by combining education with targeted strategies. Even when a single structure seems implicated, a broader view that integrates the whole pelvic-lumbar system often yields the most reliable path to relief.

Next Steps

For clinicians, consider a structured assessment that integrates pelvic mechanics, neural pathways, and patient-reported symptoms, potentially coordinating with physical therapy and medical evaluation. For patients, discuss pelvic stability and nerve pathways with your clinician to learn about diagnostic steps and personalized treatment options. If you’re seeking further guidance, request a consultation to discuss a tailored evaluation plan that aligns with your goals and safety.

Pelvic Nerves and Ligaments in Lower Back Pain: Understanding Entrapment and Relief Strategies (Part 2) Read Post »

Treating low back pain
Spine

A Practical Approach to the Low Back: Targeting Fascia, Ligaments, and Tendinous Attachments (Part 3)

A Practical Approach to the Low Back: Targeting Fascia, Ligaments, and Tendinous Attachments (Part 3)

For clinicians who treat low back pain, a paradigm shift is underway: we can move beyond primarily targeting discs and nerves and toward understanding the fascia, ligaments, and muscle-tendon attachments that fundamentally stabilize the lumbar region. When we focus on these structures—the thoracolumbar fascia, attachments at the iliac crest, and the fascial connections surrounding the lumbar spine—we open up a broader, more effective set of diagnostic and therapeutic options. This approach helps explain why some patients who have failed epidurals or traditional corticosteroid therapies still improve with regenerative or targeted soft-tissue treatments. It also provides a framework for explaining to patients why pain may persist even when imaging looks relatively benign.

Begin with fascia as a central concept. The thoracolumbar fascia is more than a passive cover; it forms a critical plane that transmits forces between the abdominal wall, the back muscles, and the spine. Chronic tension in this fascia can create tugging forces at bony landmarks such as the iliac crest and the posterior lumbar region. Over time, sustained tension can lead to calcifications, microtears, or degenerative changes at attachments. When evaluating a patient, ask: Is there a pattern of midline or crest-located pain that worsens with movement or fascia-tension activities? Do imaging studies show calcifications or cystic changes near the crest or along the fascia’s paths? These clues guide you toward a management plan that includes addressing fascial integrity, not just nerve or disc pathology.

Understanding attachments matters because they are the sites where muscles and ligaments anchor to bone. The spine is a dynamic system: muscles attach to vertebrae, ligaments anchor to bone surfaces, and fascia blends between anterior and posterior structures. In the low back, these attachments can become symptomatic when tense, torn, or calcified. For example, the area around the iliac crest and lateral trochanter can show feathery calcifications on radiographs, which reflect long-standing attachment stress. These findings are not incidental; they point to mechanical drivers of pain that may respond to targeted regenerative or rehabilitative strategies. Ultrasound and advanced imaging help visualize these attachments and the fascia’s boundaries. By mapping these landmarks—iliac crests, spinous processes, transverse processes, and the sacral edges—you can guide injections or tissue-modifying therapies to the precise sites contributing to pain.

Another key piece is recognizing that pain generators in the low back are often overlapping. A patient’s pain may emanate from a combination of disc, facet joints, nerve structures, and soft-tissue attachments. When a steroid epidural fails to produce lasting relief, it’s a signal to reassess: could fascia or tendon-to-bone attachments be driving the pain? In these scenarios, therapies that target soft tissue—platelet-rich plasma (PRP), platelet-poor plasma (PPP), or stem-cell–based strategies—offer the potential to regenerate or repair damaged fascia and tendon interfaces. Early-stage evidence and clinical experience support the safety and utility of these approaches for soft tissue and ligamentous pathology, provided they are applied with careful patient selection and ultrasound guidance.

Practical steps to implement in your practice begin with a thorough but focused history and a biomechanical exam. Ask patients about activities that tension the thoracolumbar fascia—lifting, twisting, or sudden hip-flexor-dominant movements. Observe movement patterns and palpate along the crest, the transverse and spinous processes, and the posterior lumbar muscles for tenderness or bony wear. Use ultrasound not only to visualize soft tissue integrity but also to identify the fascia’s planes and attachment points. When you suspect fascial or attachment-driven pain, consider regenerative injections to the relevant fascial interfaces and tendon attachments. Platelet-rich products can be introduced to support tissue healing, while ensuring that you document responses carefully to build a personalized, iterative treatment plan.

In addition to regenerative approaches, don’t underestimate the value of foundational modalities: physical therapy focused on stabilizing the posterior elements, gradual loading strategies that promote tissue remodeling, and targeted manual therapies to restore fascial glide and reduce trigger points. A multimodal plan often yields the best outcomes because it addresses both the mechanical basis of pain and the tissue-level healing processes. If imaging or diagnostic blocks reveal that pain is driven by deeper structures, convert insights into a staged plan that escalates from conservative care to targeted interventions as needed. The overarching goal remains consistent: reduce pain, improve function, and restore durable mechanical health to the lumbar region.

Education is a critical companion to treatment. Help patients understand that the low back is a complex, integrated system, where fascia, muscles, ligaments, and bones all contribute to stability and movement. Framing pain within this network helps patients participate in a long-term plan rather than seeking a quick fix. Share the rationale for regenerative therapies and how they complement exercise, posture retraining, and ergonomic modifications. With proper patient education, you can set realistic expectations and improve adherence to a comprehensive treatment program.

As you advance this approach, you’ll gain a more nuanced map of the low back’s soft tissue architecture. You’ll be better equipped to select injection targets with ultrasound guidance, plan a staged treatment sequence, and combine regenerative therapies with rehabilitation to maximize outcomes. Although every patient is unique, the underlying principle remains universal: by healing the tissue interfaces—the fascia, ligaments, and tendon attachments that anchor the lumbar spine—you address the root mechanical drivers of pain and pave the way for lasting improvement.

A Practical Approach to the Low Back: Targeting Fascia, Ligaments, and Tendinous Attachments (Part 3) Read Post »

Clinic Operations, Lower Extremity, Spine, Upper Extremity

Sharpening Ultrasound Skills for Spinal Injections: A Practical How-To for Providers

Sharpening Ultrasound Skills for Spinal Injections: A Practical How-To for Providers

Before you start scanning, clarify your goals. Identify the target anatomy for your planned injection—whether you’re aiming for the spinous process, lamina, facet joints, or transverse processes. Mapping out your needle trajectory and entry angles ahead of time helps you select the most appropriate transducer and scanning window. Establishing these parameters upfront sets the stage for a smoother, more precise procedure.

Transducer selection is central to this process. The curvilinear transducer, typically lower in frequency with a larger footprint, excels when target depth is a factor. For structures around five centimeters or deeper, it provides better penetration and a broader field of view, enabling you to visualize deep bony landmarks and the needle path with greater confidence. A key advantage of the curvilinear probe is its multi-angle sound-wave emission, which can improve visualization when you plan multiple needle angles during the injection.

By contrast, the linear transducer offers higher near-field resolution and is superb for superficial structures—roughly zero to four centimeters deep. It provides detailed visualization of the superficial bone cortex and soft tissue, which can be crucial for precise needle localization once the trajectory is established and the target lies within the near field. A practical approach is to start with curvilinear for depth and broad overview, then switch to linear for final needle advancement and fine-tuning in the near field.

Imaging the spinal cortex and landmarks benefits from understanding how the angle of insonation affects reflection. Perpendicular insonation yields the brightest reflections from cortical bone, so position the transducer to maximize perpendicular impact on the spinous processes, lamina, and facet joints. With a curvilinear probe, you can take advantage of multiple incident angles to enhance visualization of complex anatomy and to track the needle when approaching from multiple directions. If you encounter artifact or shadowing, a small adjustment in angle or a gentle rock of the probe can optimize reflections from the cortical bone.

Transducer selection is more than a procedural backdrop; it’s a lever that can meaningfully improve accuracy, safety, and efficiency. By understanding the trade-offs between curvilinear and linear probes and applying deliberate imaging strategies, clinicians can elevate their ultrasound-guided spinal injections and deliver better patient care.


Sharpening Ultrasound Skills for Spinal Injections: A Practical How-To for Providers Read Post »

lumbar spine mechanics
Spine

Lumbar Biodynamics for Orthopedics: Posterior Stabilization with Ultrasound-Guided Injections

Lumbar Biodynamics for Orthopedics: Posterior Stabilization with Ultrasound-Guided Injections

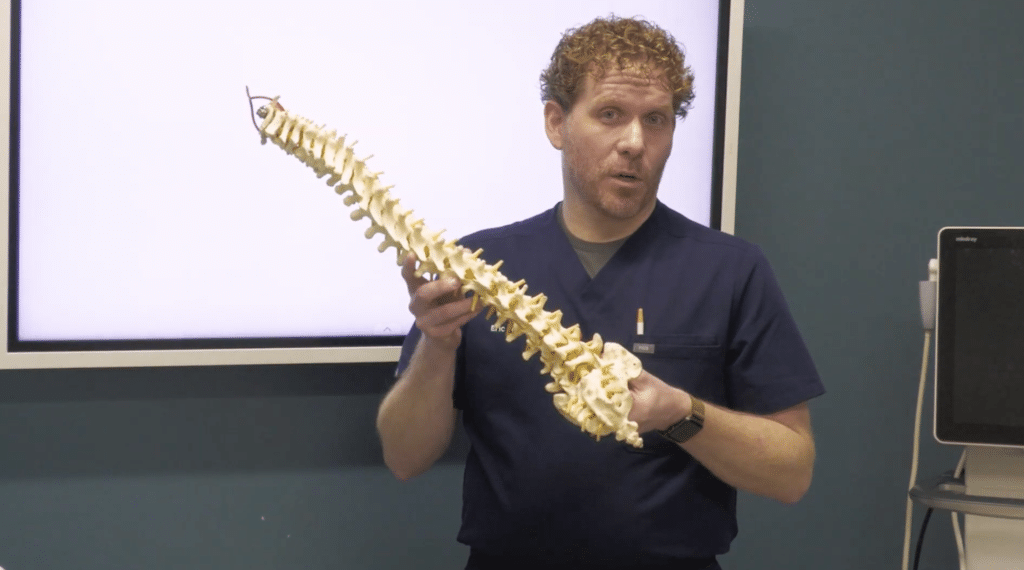
I’m Dr. Eric Philippi of RPI, and I want to share a biomechanically informed perspective on the lumbar spine and how targeted injections can support posterior stability. This article is written for orthopedic providers—spine fellows, sports medicine specialists, interventional pain physicians—who want to translate lumbar biomechanics into actionable clinical practice.

The lumbar functional unit is more than a stack of vertebrae; it’s a dynamic system where each level interacts with the one above and below through vertebral bodies, discs, lamina, facet joints, and the posterior ligaments. In this context, biodynamics and the concept of “biotensegrity”—the posterior elements acting as stabilizers—offer a practical framework for understanding pain generators and guiding interventions.

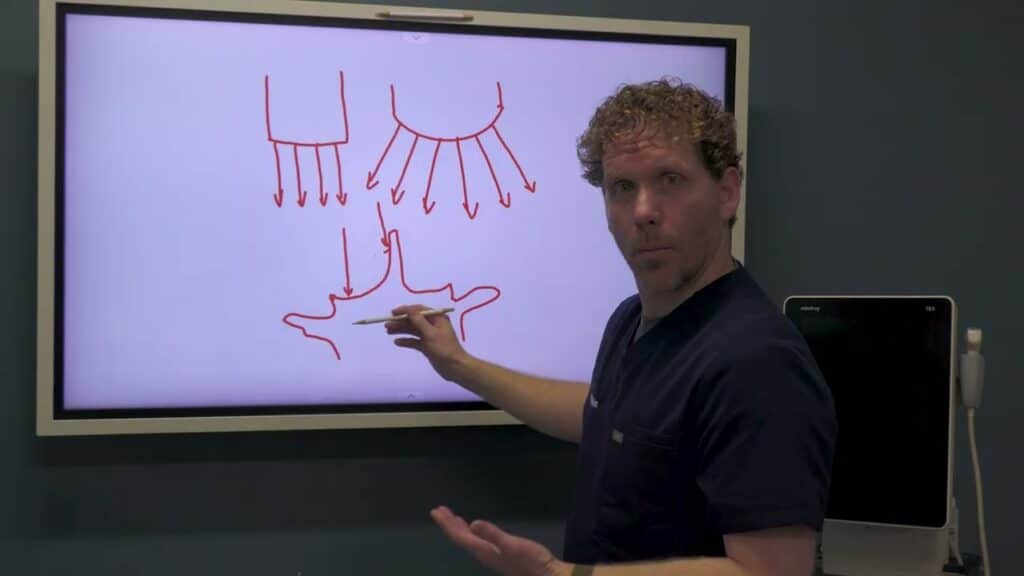
A useful way to think about this is via the fulcrum analogy. The facet joints act as a central pivot, with the lamina and posterior ligaments providing stabilizing support. When posture deteriorates, repetitive strain, or acute trauma loosens these ligaments, the load distribution shifts. The result can be accelerated disc degeneration, facet arthropathy, and nerve irritation. My approach is to restore stability by delivering precise injections that reinforce the posterior spine and reduce mechanical stress on the discs and nerve roots.

In practice, I emphasize a targeted posterior approach under ultrasound or palpation guidance. The goal is to tighten and stabilize the posterior ligaments and elements to restore a more physiological lumbar lordosis and to relieve forward-directed pressure on the discs. By stabilizing the posterior aspects, we can potentially mitigate nerve compression and facet-related pain while preserving mobility. This is not about a one-size-fits-all solution; it’s about identifying which posterior structures contribute to instability in a given patient and choosing an injection strategy that addresses those components.

Ultrasound guidance plays a central role in this plan. It enhances our ability to visualize posterior spinal structures, confirm needle trajectory, and ensure accurate deposition around ligaments and joints. With ultrasound, we can verify that our target is reached without compromising nearby neural structures. The practical takeaway is to map the spine’s alignment, identify the posterior stabilizers, and then deliver a targeted injection that supports the spine’s natural biomechanics.

In designing a treatment course, consider how biodynamics informs patient selection. Patients with recurrent episodes of facet-related pain, subtle sagittal imbalance, or segmental instability may benefit from a posterior stabilization strategy. The injections themselves can help restore proprioceptive feedback and reduce inflammatory signaling within the posterior elements, potentially decreasing pain and improving function. That said, the success of this approach hinges on careful patient selection, precise technique, and thoughtful integration with rehabilitation.

A primer on this approach is also a reminder that biomechanics should inform not only injections but the broader care pathway. Imaging findings must be interpreted in the context of standing and dynamic spinal mechanics. When planning injections, I assess global alignment, segmental stability, and the contribution of posterior ligaments to load transfer. I view the spine as a cohesive unit, where restoring posterior stability can reduce strain on the discs and facets and support a more favorable healing environment.

As we prepare for ongoing education and conference discussions—such as insights into the biodynamics of the lumbar spine—this framework helps translate theory into practice. If you’re an orthopedic provider, consider how a biomechanical lens—focusing on stabilizing the posterior spine—might refine your patient selection, injections, and rehabilitation plans. It’s not only about relief of pain; it’s about restoring functional biomechanics to preserve mobility and quality of life.

Lumbar Biodynamics for Orthopedics: Posterior Stabilization with Ultrasound-Guided Injections Read Post »

Spine, Nerves

Thoracolumbar Fascia at the PSIS: Ultrasound Diagnosis and Injection Guide

Thoracolumbar Fascia at the PSIS: Ultrasound Diagnosis and Injection Guide

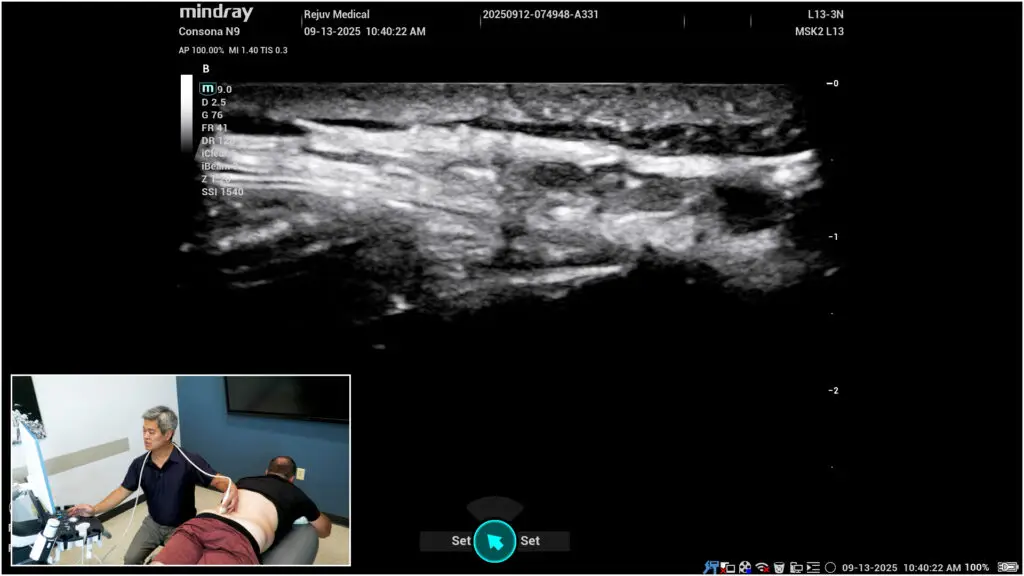
Axial low back pain that patients localize with a fingertip over one or both posterior superior iliac spines (PSIS) often implicates the thoracolumbar fascia (TLF). With ultrasound, you can reliably identify the PSIS, visualize both deep and superficial TLF bands, and target regenerative injections to the most pathologic tissue.

Clinical pattern

When asked, many patients point to “that spot” just over the PSIS on one or both sides. This aligns with the primary TLF attachment on the posterior-superior aspect of the ilium. Reproducible point tenderness here—especially with resisted trunk motions or prolonged standing—raises suspicion for TLF strain/degeneration.

Find the PSIS fast

If surface anatomy is challenging (e.g., higher BMI), use the thenar eminence as a broad palpation tool to locate the bony prominence. Set your fingertips where the thenar eminence lands to fine-tune position.

Ultrasound roadmap

1) Orient in transverse (short axis) to confirm PSIS.

  • On screen, set medial = right and lateral = left (match your machine conventions).
  • Identify the superficial PSIS cortex.

2) Deep band (long axis over the PSIS ridge).

  • Pivot to long axis so the PSIS cortex spans the screen.
  • Scan medially↔laterally to survey the deep TLF attachment.
  • Pathology clues: cortical irregularity, hypoechoic change at the enthesis, or loss of crisp fibrillar interfaces consistent with chronic strain/degeneration.
  • Injection: in-plane or out-of-plane tracking along the ridge where the deep band anchors.

3) Superficial band (rotate 60–90°).

  • Pivot the superficial end medially until a bright, thick, superficial band comes into view descending to the PSIS.
  • Pathology is often more frequent here: look for hypoechoic banding, focal calcific/enthesophyte change, or disrupted echotexture.
  • Sweep to capture the worst segment—many patients show maximal findings slightly lateral to midline.

Injection technique pearls

  • Target the most abnormal segment (superficial more often symptomatic); treat the deep band when cortical irregularity/hypoechogenicity is prominent at the ridge.
  • Keep the needle in-plane when feasible for precise deposition; use small test volumes to confirm plane/spread.
  • Hydrodissect along the diseased layer to restore glide, then deliver your chosen regenerative solution (e.g., dextrose, PRP) into the fascial plane/enthesis.
  • Avoid intratendinous spread into adjacent gluteal or paraspinal tendons unless intentionally treating them.
  • Combine with a load-management plan (hip hinge mechanics, posterior chain strength, lumbopelvic stabilization) to reduce recurrence.

Why this matters

The PSIS-level TLF is a high-yield pain generator in axial LBP and often overlooked when imaging focuses only on discs or facet joints. Systematic ultrasound evaluation of deep vs superficial bands lets you localize pathology and treat precisely, often producing meaningful relief in patients who’ve “tried everything.”

Thoracolumbar Fascia at the PSIS: Ultrasound Diagnosis and Injection Guide Read Post »

Spine, Clinic Operations, Lower Extremity, Nerves, Upper Extremity

Ultrasound-Guided Needling: A Stepwise Technique You Can Trust

Ultrasound-Guided Needling: A Stepwise Technique You Can Trust

Ultrasound guidance can take injections from “good enough” to precise, safe, and reproducible—especially near small targets like nerves. This quick guide distills a stepwise approach you can apply immediately in clinic.

1) Set up before you scan

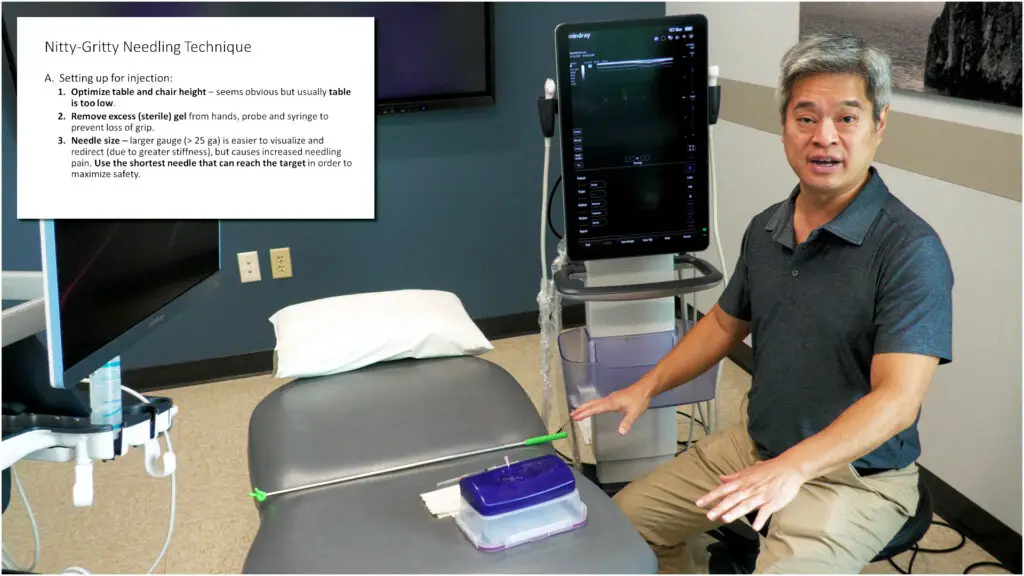
  • Ergonomics first: Adjust table/chair height so a shallow in-plane angle feels natural. If the table is too low, you’ll default to a steep, hard-to-control trajectory.
  • De-gel for control: Diagnostic scans love extra gel; injections do not. Wipe probe, hands, and syringe so you can make micro-movements without slipping.
  • Right tools: Prefer the shortest needle that reaches the target. Use smaller gauges (e.g., 25G) for patient comfort as your skill grows. Match syringe size to control—smaller barrels are easier to finesse; learn alternate grips for stability and continuous injection.

2) Master the probe hold (micro-moves matter)

Use a three-finger wrap high on the probe with the 4th/5th fingers resting on the patient. This balances stability with mobility, enabling all five motion families (slide long/short axis, rotate, tilt, heel-toe) in tiny increments. Flex the wrist—this “intentional discomfort” increases leverage and fine control.

3) Line up like a pool cue

Before inserting the needle, align patient → target → probe → injecting hand → eyes → screen. Keep the second monitor low enough that you glance with your eyes, not your neck. Minimize skin-to-target distance: position the probe so your path is short and your needle can stay shallow.

4) Geometry beats guesswork

  • Depth decides angle. Estimate target depth and pick an initial angle (e.g., ~30–45°) relative to the probe, not the room. If you tilt the probe (to fight anisotropy), adjust needle angle to match.
  • Stand off the footprint. Avoid inserting right against the probe—maintain room to pivot and protect the transducer.

5) Keep the needle in view (and prove it’s the tip)

Three visualization boosters:

  1. Heel-toe toward the needle to make the beam more perpendicular—needle brightens dramatically.
  2. Oscillate the needle (tiny in-out “sewing” motion) while keeping net depth unchanged.
  3. Lateral sweep the probe ~5 mm each way—like radar—to pass over the true tip.
    Safety check: the on-screen motion of the tip must match your hand movement; if not, you’re probably seeing shaft, not tip.

6) Correct deliberately—don’t “fish”

If you’re off target, retract almost to skin, adjust angle, then re-advance. Don’t bend the needle by steering while deep. Frequently look at your hands to ensure the probe is centered over the needle path (dominant-hand drift is common). Break contact points if needed—another moment of intentional discomfort that prevents hidden angle changes.

7) Progress thoughtfully

Skill progression runs: safe → effective → minimal pain → efficient → effortless. Smaller needles, fewer redirects, and consistent visualization take thousands of iterations—but they spare patients bruising and you frustration.

Ultrasound-Guided Needling: A Stepwise Technique You Can Trust Read Post »

Spine

Pelvic & Lumbar Nerve Entrapments: A Practical Guide for Persistent Low-Back and Pelvic Pain

Pelvic & Lumbar Nerve Entrapments: A Practical Guide for Persistent Low-Back and Pelvic Pain

Low-back pain is one of the most common complaints in clinical practice—and a surprising amount of it isn’t purely disc, facet, or SI-joint related. Peripheral nerve entrapments around the lumbar spine and pelvis often drive pain patterns that look “radicular,” resist standard care, and linger for years. In this quick guide—adapted from a live teaching session—we’ll tour the key posterior and anterior pelvic nerves, how they get trapped, and practical ways to find and treat them with palpation and ultrasound.

Posterior Pelvis: Meet the Cluneal Nerves

Why they matter. Superior, middle, and inferior cluneal nerves provide cutaneous innervation across the low back and buttock. They’re frequently irritated in the setting of lumbar/SI instability and facet degeneration—think “double crush”: one site at the spine/facet and another as the nerve crosses fascia or bone.

Superior cluneal nerve (SCN—especially the L3 branch).
The L3 SCN is the usual suspect. It’s commonly irritated:
• Proximally near the L5–S1 facet, and
• Distally as it passes a fibro-osseous tunnel over the iliac crest.
Patients may have focal tenderness along the crest and pain that tracks toward the greater trochanter—a helpful mental “target” because many posterior pelvic sensory branches visually and clinically “point” there.

Middle cluneal nerve (MCN).
This nerve traverses the posterior SI ligaments and the paraspinal musculature. The S1 branch takes a sharp turn beneath the PSIS, running over the posterior long SI ligament—a classic spot where tissue glide is poor and palpation is exquisitely tender. Hydrodissection here can instantly change a “disc-like” pain picture.

Inferior cluneal nerve (ICN).
A branch of the posterior femoral cutaneous nerve, the ICN emerges near the gluteal cleft and innervates the inferior-medial buttock. Its territory overlaps with pudendal branches, so patients with “sit bone” or rectal-adjacent pain often report aggravation when seated on hard surfaces.

Landmarking and technique cues.
Systematically mark the PSIS, iliac crest (carry the line forward; the whole crest matters), the lateral sacral border, and the ischial tuberosity. With those bony rails mapped, palpation-guided injections become straightforward; ultrasound refines the plan by visualizing facets, fascial tunnels, and the nerve as it dives or turns.

Anterior Pelvis: Iliohypogastric, Ilioinguinal, Genitofemoral & Friends

Iliohypogastric (IH) vs Ilioinguinal (II).
These travel between the internal oblique and transversus abdominis before getting more superficial. Two rules help:
• Trajectory around the crest:
  – IH tends to run 1–2 cm above the iliac crest.
  – II runs on the crest.
• Inguinal canal behavior:
  – IH stays above the canal (about 2 cm superior to the ASIS and the canal itself).
  – II enters and traverses the inguinal canal and supplies the pubic and proximal medial-thigh region.

Genitofemoral (GF).
Splits into a genital branch (often tracking with II through the canal) and a femoral branch that lies just superior to the femoral artery under the inguinal ligament (look ~1.5 cm lateral to the artery for tenderness).

Subcostal nerve.
Similar field to IH but typically 2–3 cm above it; has a lateral cutaneous branch between the mid-axillary line and ASIS.

Femoral & obturator nerves.
These are deeper and often best addressed with ultrasound:
• Femoral: identify the femoral artery, then look lateral for the nerve in the iliopsoas groove.
• Obturator: exits the obturator canal, then splits within the fascial planes between adductor longus, brevis, and magnus—a great target in chronic adductor strains and “sports hernia” patterns.

Lateral femoral cutaneous nerve (LFCN).
Classic meralgia paresthetica arises as LFCN crosses medial to the ASIS, under the inguinal ligament, and over the sartorius. Treat the triangle just distal/medial to ASIS, then track anteriorly to catch the bifurcation—posterior fibers run toward the fibular head, anterior fibers toward the VMO region.

The Knee’s Patellar Plexus: Don’t Forget the Rim

Anterior knee pain that worsens with kneeling isn’t always patellofemoral syndrome. The anterior femoral cutaneous branches, LFCN, and infrapatellar saphenous branches create a patellar plexus right along the patellar rim. Because these are superficial cutaneous nerves draped over bone, compression occurs at superior, mid-rim, and inferior points. Palpate the rim methodically; tender “snap-points” often respond dramatically to small-volume hydrodissection.

ACNES: Abdominal Cutaneous Nerve Entrapment Syndrome

When the GI workup is pristine but focal abdominal pain persists, think ACNES. Thoracic roots (T7–T12) travel between abdominal wall layers, then turn sharply through the linea semilunaris and rectus sheath to pierce the fascia via a small aponeurotic ring—a perfect choke point.
Clues: a fingertip-sized spot of maximal tenderness, a positive Carnett sign (pain remains or worsens when the patient tenses the abdomen), and immediate relief after a small diagnostic/therapeutic injection into the ring. Ultrasound helps you find the fascial exit; Doppler may show the companion artery.

TAP Blocks & Why Ultrasound Wins

A transversus abdominis plane (TAP) block spreads fluid between the internal oblique and transversus abdominis, bathing IH/II (and sometimes subcostal) along their course. You can approach more lateral (mid-axillary, over the iliac crest) or more anterior (near the ASIS), depending on where palpation and symptoms localize. Ultrasound confirms the three muscle layers and shows the hydrodissection plane in real time.

For the posterior pelvis, ultrasound is equally helpful:
• Visualizing the L5–S1 facet adjacent to the SCN
• Dissecting the posterior long SI ligament for MCN entrapment
• Tracking the pudendal course between the sacrospinous and sacrotuberous ligaments toward Alcock’s canal
• Identifying the sciatic and posterior femoral cutaneous nerves around the ischial tuberosity and quadratus femoris

Caudal Epidural with Dextrose: A Safe, Central “Reset”

As a complement to perineural work, a caudal epidural (performed under ultrasound by identifying the sacral cornua and entering the canal beneath the sacro-coccygeal ligament) can “centralize” pain and calm multiple irritated roots. Hyperosmolar solutions like dextrose have been studied for decades; many clinicians now use dextrose as an active therapeutic rather than just a carrier. Ultrasound and color flow confirm correct spread in the epidural space.

Take-Home Pearls

• If you can push it and reproduce the pain, it’s probably peripheral. Radiculopathy often isn’t tender to focal palpation; cluneal and cutaneous entrapments usually are.
• Map first, treat second. Mark PSIS, iliac crest, sacral border, ischial tuberosity, ASIS, and the inguinal ligament. Landmarks turn chaos into a protocol.
• Think in planes and tunnels. Fascia + bony edges + sharp turns = likely choke points.
• Use ultrasound to see the problem. It upgrades safety, accuracy, and patient confidence.
• Remember the “greater trochanter target.” Many posterior pelvic branches aim toward it—track pain patterns with that in mind.

Clinical content is for educational purposes for trained healthcare professionals. Patients should consult qualified clinicians before any procedure or treatment.

Pelvic & Lumbar Nerve Entrapments: A Practical Guide for Persistent Low-Back and Pelvic Pain Read Post »

Scroll to Top