Filter posts by category

Upper Extremity

Clinic Operations, Lower Extremity, Spine, Upper Extremity

Sharpening Ultrasound Skills for Spinal Injections: A Practical How-To for Providers

Sharpening Ultrasound Skills for Spinal Injections: A Practical How-To for Providers

Before you start scanning, clarify your goals. Identify the target anatomy for your planned injection—whether you’re aiming for the spinous process, lamina, facet joints, or transverse processes. Mapping out your needle trajectory and entry angles ahead of time helps you select the most appropriate transducer and scanning window. Establishing these parameters upfront sets the stage for a smoother, more precise procedure.

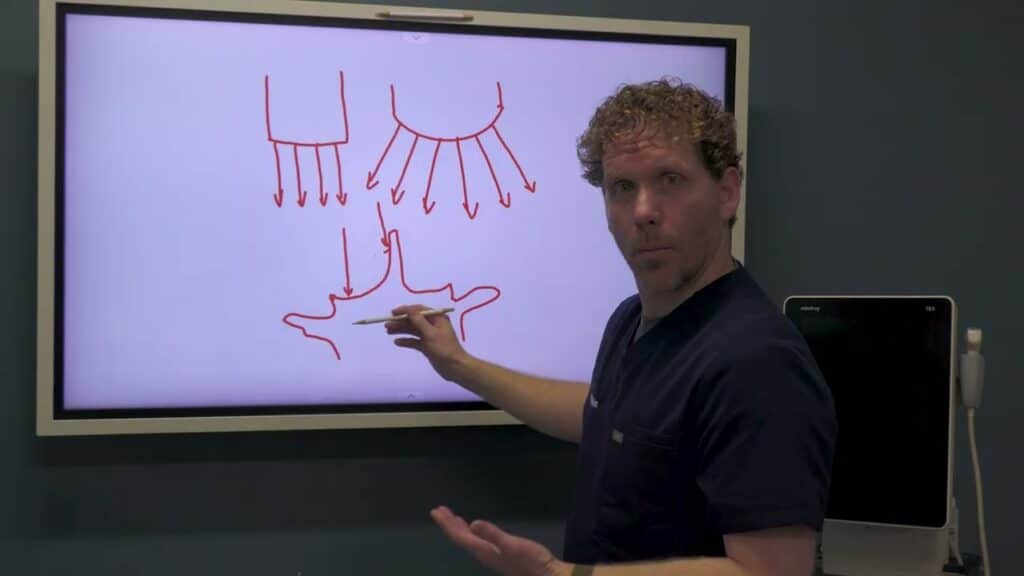
Transducer selection is central to this process. The curvilinear transducer, typically lower in frequency with a larger footprint, excels when target depth is a factor. For structures around five centimeters or deeper, it provides better penetration and a broader field of view, enabling you to visualize deep bony landmarks and the needle path with greater confidence. A key advantage of the curvilinear probe is its multi-angle sound-wave emission, which can improve visualization when you plan multiple needle angles during the injection.

By contrast, the linear transducer offers higher near-field resolution and is superb for superficial structures—roughly zero to four centimeters deep. It provides detailed visualization of the superficial bone cortex and soft tissue, which can be crucial for precise needle localization once the trajectory is established and the target lies within the near field. A practical approach is to start with curvilinear for depth and broad overview, then switch to linear for final needle advancement and fine-tuning in the near field.

Imaging the spinal cortex and landmarks benefits from understanding how the angle of insonation affects reflection. Perpendicular insonation yields the brightest reflections from cortical bone, so position the transducer to maximize perpendicular impact on the spinous processes, lamina, and facet joints. With a curvilinear probe, you can take advantage of multiple incident angles to enhance visualization of complex anatomy and to track the needle when approaching from multiple directions. If you encounter artifact or shadowing, a small adjustment in angle or a gentle rock of the probe can optimize reflections from the cortical bone.

Transducer selection is more than a procedural backdrop; it’s a lever that can meaningfully improve accuracy, safety, and efficiency. By understanding the trade-offs between curvilinear and linear probes and applying deliberate imaging strategies, clinicians can elevate their ultrasound-guided spinal injections and deliver better patient care.


Sharpening Ultrasound Skills for Spinal Injections: A Practical How-To for Providers Read Post »
Upper Extremity

Mastering AC Joint Landmarking for Shoulder Injections: Part 1 — Common Errors and Corrections

Mastering AC Joint Landmarking for Shoulder Injections: Part 1 — Common Errors and Corrections

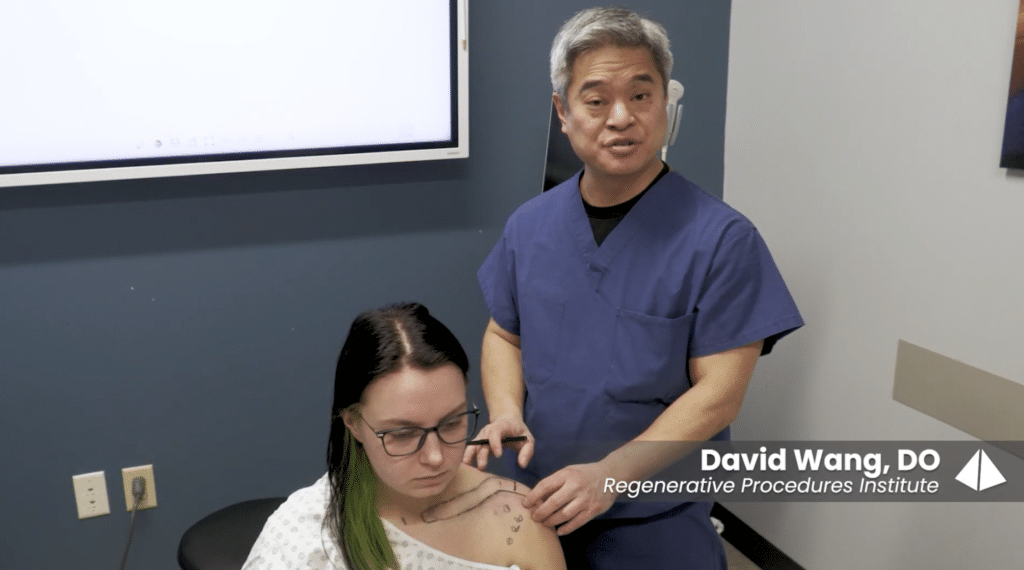
I’m Dr. David Wang from RPI, and I’m sharing a practical, clinician-focused guide to improve palpation-based landmarking for shoulder injections. This is Part 1 of a two-part series designed for orthopedic providers who want to translate palpable anatomy into accurate, safe injections around the clavicle and AC joint.

The shoulder region presents a challenging landscape for landmarks. The AC joint sits where the distal clavicle meets the acromion, but the superficial cues we rely on can be misleading. A frequent error I see is marking the sternoclavicular region or a lateral line in place of the true AC joint boundary. The sternoclavicular joint is near the sternal notch, a narrow landmark. When you place a line laterally across the shoulder to demarcate the AC joint, you risk overshooting medially or laterally, misaligning your subsequent injection plan. The sternal notch itself is relatively small, and it’s flanked by a clavicle that trails medially and laterally as it curves. Understanding this spatial relationship is essential for accurate injection targeting.

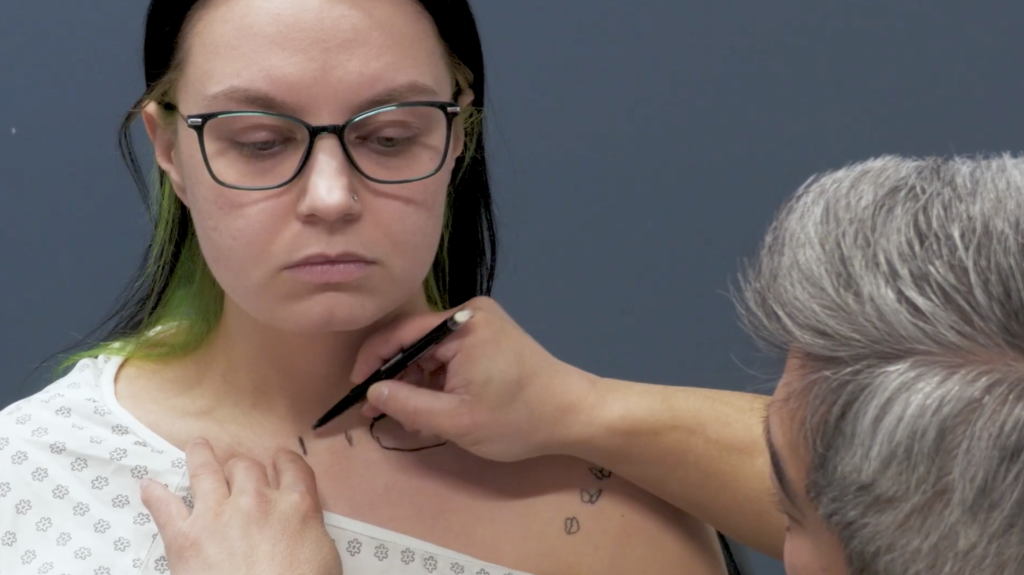
To avoid these missteps, I emphasize the concept of three divots around the AC area. The middle divot corresponds to the AC joint itself. The lateral divot marks the edge of the acromion, while the medial divot sits near the distal clavicle’s curvature. The challenge is that the distal clavicle is not a uniform edge; it has a subtle S-curve that transitions from a more cylindrical medial segment to a flatter distal segment. This curvature shifts the posterior border of the clavicle posteriorly, a detail that is easily masked by the trapezius muscle. If you rely on a straight-line approach to mark the clavicle, you’ll likely misplace the AC joint and, consequently, risk misdirecting your injection.

Another layer of complexity is distinguishing the coracoid process from the clavicle’s landmarks. The coracoid is a separate bony prominence, and confusing it with the medial clavicle can throw off your landmark map. Practically, I instruct residents and fellows to palpate with a purpose: identify the medial edge of the clavicle, then trace the clavicle’s S-curve toward the distal end, where it meets the V-shaped posterolateral corner. The V marks the termination of the clavicle and aligns with the AC joint line. This alignment is critical for planning injections near the superior labrum and adjacent structures.

With palpation alone, these landmarks can be elusive, particularly in patients with arthritic changes that alter bony margins. That’s why a robust mental map of distances helps: the midpoint of the AC joint is typically about two centimeters medial from the lateral edge of the acromion. This spatial rule of thumb provides a practical check when palpation feels uncertain. Even when the joint line isn’t easily palpable, knowing these relationships improves your odds of accurate injection localization.

In Part 2, we’ll move from landmark recognition to applying ultrasound guidance to refine our injections. We’ll describe a reproducible marking protocol that uses these landmarks, integrates with ultrasound visuals, and reduces tissue misplacement. If you’d like, I can tailor this content for a specific orthopedic subspecialty, or convert it into a workshop handout, diagram set, or printable marking checklist.

CLICK HERE FOR PART 2

Mastering AC Joint Landmarking for Shoulder Injections: Part 1 — Common Errors and Corrections Read Post »

Upper Extremity

Completing the Picture: Clavicle Landmarking, Curvature, and Safety for Shoulder Injections (Part 2)

Completing the Picture: Clavicle Landmarking, Curvature, and Safety for Shoulder Injections (Part 2)

I’m Dr. David Wang of RPI, continuing our focused discussion on accurate palpation-based marking for shoulder injections. This installment zooms in on the clavicle’s curvature, the posterior border, and the V landmark—crucial for accurate, safe injections near the clavicle and superior shoulder region.

The clavicle is not a uniform cylinder. The medial aspect remains relatively rounded, while the lateral portion flattens and widens, creating a dynamic landmark landscape. The posterior border of the distal clavicle sits further back than learners expect, largely due to the overlying trapezius and the clavicle’s curved anatomy. When marking, it’s essential to preserve the clavicle’s natural S-curve and to identify the V-shaped posterolateral clavicle corner, which marks the entry point for superior injections toward the labrum.

A critical error to avoid is misidentifying the coracoid process as part of the clavicle. The coracoid is a distinct structure, and misidentifying it can derail marking accuracy. By maintaining awareness of the clavicle’s curvature and its posterior border, you’ll be better equipped to target the superior shoulder region safely and effectively. To implement this in practice, mark the medial clavicle edge that truly reflects the medial boundary, outline the S-curve and posterior border, and identify the V landmark that guides injections toward the labrum region. When used with ultrasound guidance, this approach improves accuracy and reduces tissue misplacement.

CLICK HERE FOR PART 1

Completing the Picture: Clavicle Landmarking, Curvature, and Safety for Shoulder Injections (Part 2) Read Post »

Spine, Clinic Operations, Lower Extremity, Nerves, Upper Extremity

Ultrasound-Guided Needling: A Stepwise Technique You Can Trust

Ultrasound-Guided Needling: A Stepwise Technique You Can Trust

Ultrasound guidance can take injections from “good enough” to precise, safe, and reproducible—especially near small targets like nerves. This quick guide distills a stepwise approach you can apply immediately in clinic.

1) Set up before you scan

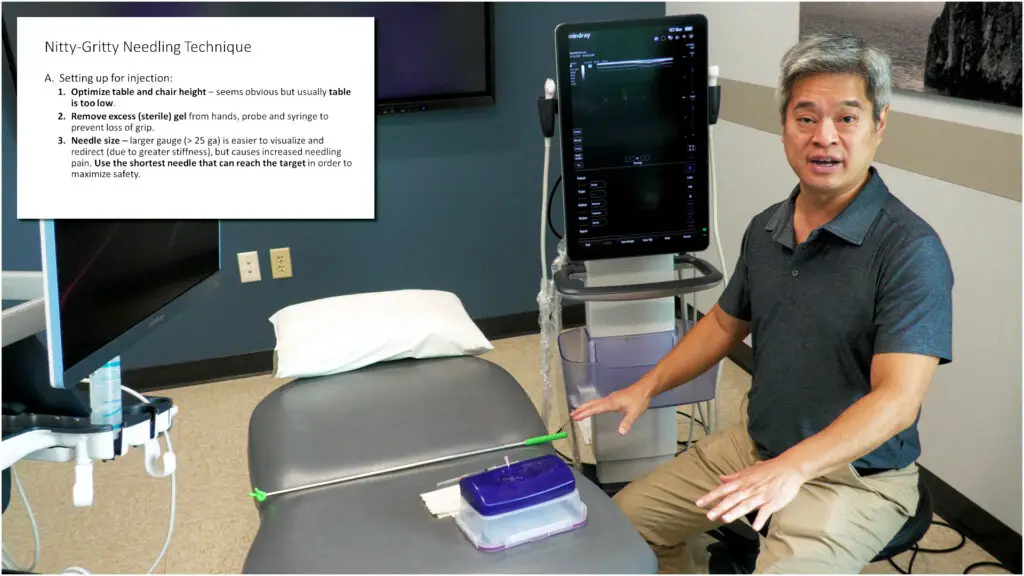
  • Ergonomics first: Adjust table/chair height so a shallow in-plane angle feels natural. If the table is too low, you’ll default to a steep, hard-to-control trajectory.
  • De-gel for control: Diagnostic scans love extra gel; injections do not. Wipe probe, hands, and syringe so you can make micro-movements without slipping.
  • Right tools: Prefer the shortest needle that reaches the target. Use smaller gauges (e.g., 25G) for patient comfort as your skill grows. Match syringe size to control—smaller barrels are easier to finesse; learn alternate grips for stability and continuous injection.

2) Master the probe hold (micro-moves matter)

Use a three-finger wrap high on the probe with the 4th/5th fingers resting on the patient. This balances stability with mobility, enabling all five motion families (slide long/short axis, rotate, tilt, heel-toe) in tiny increments. Flex the wrist—this “intentional discomfort” increases leverage and fine control.

3) Line up like a pool cue

Before inserting the needle, align patient → target → probe → injecting hand → eyes → screen. Keep the second monitor low enough that you glance with your eyes, not your neck. Minimize skin-to-target distance: position the probe so your path is short and your needle can stay shallow.

4) Geometry beats guesswork

  • Depth decides angle. Estimate target depth and pick an initial angle (e.g., ~30–45°) relative to the probe, not the room. If you tilt the probe (to fight anisotropy), adjust needle angle to match.
  • Stand off the footprint. Avoid inserting right against the probe—maintain room to pivot and protect the transducer.

5) Keep the needle in view (and prove it’s the tip)

Three visualization boosters:

  1. Heel-toe toward the needle to make the beam more perpendicular—needle brightens dramatically.
  2. Oscillate the needle (tiny in-out “sewing” motion) while keeping net depth unchanged.
  3. Lateral sweep the probe ~5 mm each way—like radar—to pass over the true tip.
    Safety check: the on-screen motion of the tip must match your hand movement; if not, you’re probably seeing shaft, not tip.

6) Correct deliberately—don’t “fish”

If you’re off target, retract almost to skin, adjust angle, then re-advance. Don’t bend the needle by steering while deep. Frequently look at your hands to ensure the probe is centered over the needle path (dominant-hand drift is common). Break contact points if needed—another moment of intentional discomfort that prevents hidden angle changes.

7) Progress thoughtfully

Skill progression runs: safe → effective → minimal pain → efficient → effortless. Smaller needles, fewer redirects, and consistent visualization take thousands of iterations—but they spare patients bruising and you frustration.

Ultrasound-Guided Needling: A Stepwise Technique You Can Trust Read Post »

Scroll to Top