Filter posts by category

Treating low back pain
Spine

How to Approach the Lumbar Spine: A Practical Guide for Diagnosing and Treating Low Back Pain (Part 1)

How to Approach the Lumbar Spine: A Practical Guide for Diagnosing and Treating Low Back Pain (Part 1)

When a patient arrives with low back pain, the goal is clear: identify the pain generators and assemble a treatment plan that reduces pain, improves function, and preserves the health of the structures involved. In this guide, I’ll walk through a practical framework you can apply in clinic, with a focus on anatomy, diagnostics, and a stepwise approach to treatment that includes conservative care, injections, and regenerative techniques.

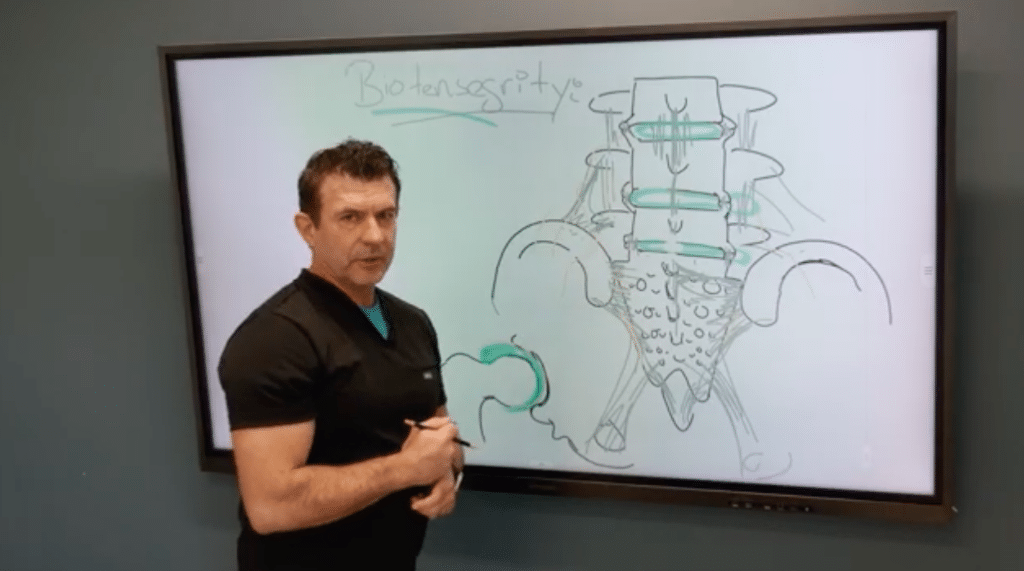
First, anchor your assessment in a solid understanding of the lumbar–sacral complex. The spine is a stack of bones with joints between them, stabilized by a network of ligaments and a surrounding joint capsule. Visually, imagine bone–disc–bone–disc along the lumbar spine, with the sacrum and ilia completing the pelvic connection. The ligaments act like a structural “duct tape,” holding the joints together and guiding movement. This integrative view matters because pain rarely comes from a single structure; it often reflects the interplay of bones, discs, ligaments, and the joints they form.

A critical hotspot to assess is the L5–S1 transition. This junction bears a lot of biomechanical and loading stress, and it’s a common source of wear, instability, and pain. L5–S1 stability depends on a robust set of ligaments, and in this region you’ll often find that the ligamentous anatomy is thinner or less robust, making the area particularly vulnerable to degeneration and inflammatory changes. When evaluating this segment, pay attention to the disk space as well as the surrounding ligamentous attachments. MRI and radiographs can reveal degenerative changes, but the clinical picture—where the patient feels pain, what movements provoke it, and what reproduces symptoms—will guide your next steps.

Beyond the L5–S1 junction, the sacral–iliac region (the SI joints) and the posterior pelvic ligaments deserve careful attention. The sacrum hosts a network of short and long ligaments that connect the ilium to the sacrum and provide both stability and subtle mobility. When you’re parsing pain in this area, consider the short sacroiliac ligaments that attach along the ilium and sacral crests, as well as the deep interosseous ligaments that act as some of the strongest stabilizers in the pelvic ring. These ligaments can be underdiagnosed as contributors to axial low back pain, yet ultrasound and targeted injections can reveal their involvement and offer therapeutic options.

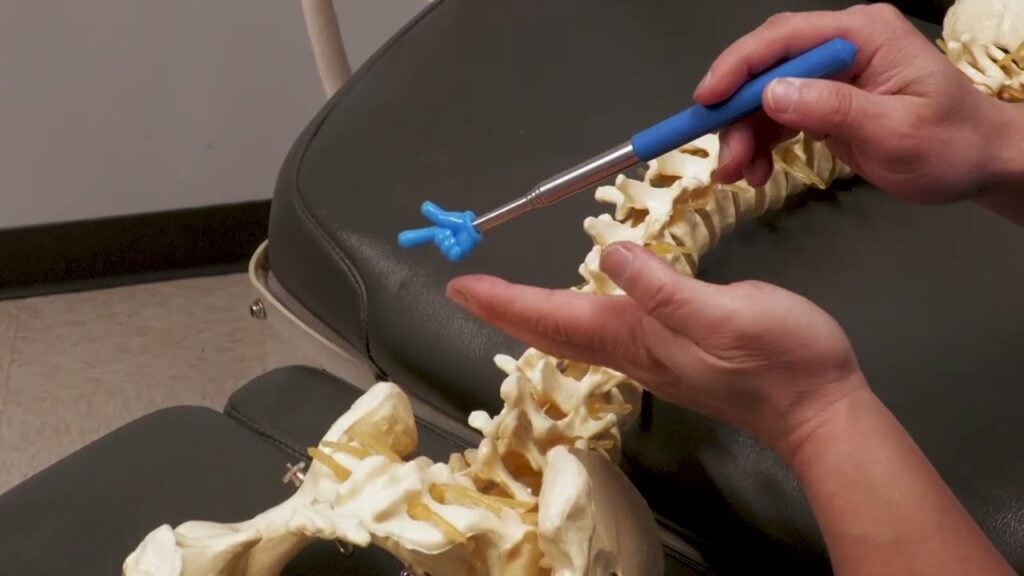
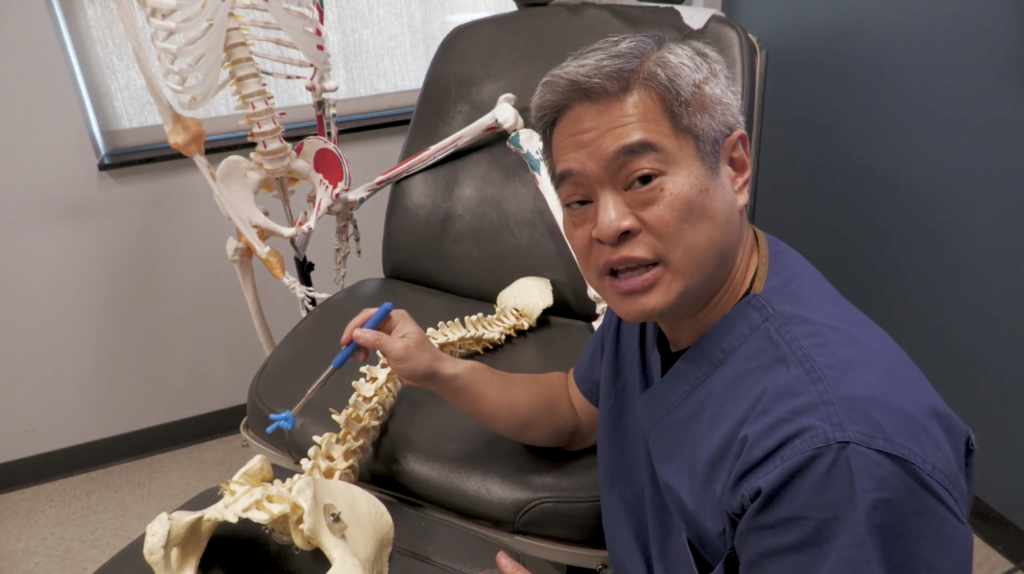
Ultrasound and dynamic testing become powerful tools once you’ve identified the ligamentous landscape. With appropriate imaging, you can visualize attachment sites and guide injections to stabilize specific ligaments or ligament complexes. A practical approach is to map the bony landmarks (such as the sacral crests, spinous processes, and tubercles) and then correlate these with palpable and ultrasound-visible ligament orientations. The goal is to restore stability to the posterior elements so that the joints move with controlled, less painful mechanics.

Treatment, in practice, is multimodal. Start with conservative measures—physical therapy to improve strength and flexibility, activity modification, and bracing when indicated. If conservative measures don’t yield sufficient relief, consider targeted interventions such as nerve blocks or epidurals to break the pain cycle and enable rehabilitation. Finally, for patients with focal ligamentous instability or degenerative changes where traditional therapies fall short, regenerative procedures that target joints, ligaments, fascia, and muscle–tascue interfaces can offer meaningful improvements in pain and function. The unifying theme is to tailor strategies to the patient’s unique anatomic and biomechanical profile, not to rely on a one-size-fits-all protocol.

As you expand your practice, you’ll develop a more nuanced sense of which structures to test and treat first. The more proficient you become at recognizing the ligamentous architecture and its role in stability, the more precise your injections, blocks, and rehabilitative plans will be. With careful assessment and a thoughtfully staged treatment plan, you can help patients achieve durable reductions in pain and meaningful gains in function.

How to Approach the Lumbar Spine: A Practical Guide for Diagnosing and Treating Low Back Pain (Part 1) Read Post »

Beyond the Disc: Understanding the Neurologic Overlay in Low Back Pain
Nerves, Spine

Pelvic Nerves and Ligaments in Lower Back Pain: Understanding Entrapment and Relief Strategies (Part 2)

Pelvic Nerves and Ligaments in Lower Back Pain: Understanding Entrapment and Relief Strategies (Part 2)

Lower back pain is a common and complex symptom with many potential drivers. Among these, the pelvic-lumbar region harbors a network of ligaments and nerves that can influence pain patterns even when the discs or joints appear non-acute. Understanding how these structures interact helps clinicians and informed patients approach assessment and relief in a more targeted and safe way. This post offers a practical framework for recognizing how pelvic ligaments and nerves may contribute to pain, what non-invasive assessments can reveal, and how to discuss safe, evidence-based strategies with a clinician.

Anatomy and Stability

Ligaments and Pelvic Support The spine is stabilized by a lattice of ligaments and connective tissues that connect the spine to the pelvis. In the lower back, several ligaments play key roles in maintaining alignment and supporting movement. The interspinous and intertransverse ligaments, along with the iliolumbar ligaments, help stabilize the lumbar region and connect to the sacrum and iliac bones. A family of pelvic ligaments known as the C ligaments adds to this complex network. Short and long fibers blend with surrounding tissues, contributing to overall pelvic stability. When instability or tightness arises, these structures can influence pelvic mechanics and potentially affect nearby nerve pathways. This is not to suggest every pain arises from these ligaments, but recognizing their role can broaden your diagnostic and therapeutic options.

Nerve Entrapment

How Pain Can Emerge A useful way to think about back and pelvic pain is to consider nerves that traverse the pelvis and lumbar region. As nerves exit the spine and pass near ligaments and bony landmarks, they can become irritated if tissues shift or stiffen. A representative pathway involves a nerve that travels near the iliac crest and crosses pelvic ligaments as it courses toward the buttock and thigh. When surrounding tissues or joints rotate or become stiff, these nerves may experience tension or compression, leading to pain that radiates or feels burning, sometimes with numbness or tingling. Clinically, researchers and clinicians look for pain reproduction with palpation over the iliac crest and particular ligament regions, and they consider whether targeted interventions might relieve nerve irritation while protecting overall safety and function.

Assessment and Safe Considerations

A practical assessment approach emphasizes non-invasive, collaborative exploration with a clinician. Start with careful palpation around the iliac crest and sacroiliac region to identify focal tenderness. Observe movement for signs of abnormal pelvic rotation or instability, as these patterns may correlate with nerve irritation. A neurologic screening helps distinguish nerve-related signs from other sources of pain. It’s important to emphasize that this overview is educational and not a substitute for professional diagnosis. If you’re experiencing persistent back or pelvic pain, seek a qualified clinician who can perform a comprehensive evaluation, including physical examination and, when appropriate, imaging or diagnostic tests.

Treatment Concepts and Cautions

In the context of pelvic instability and nerve irritation, treatment goals focus on safety, symptom relief, and restoring healthy function. A clinician might discuss strategies to reduce nerve irritability and local inflammation while avoiding procedures that are not indicated. Any approach should be tailored to the individual’s health status, activity goals, and risk factors, with careful consideration of consent, safety, and evidence-based practice. Educational conversations with patients should cover what to expect, potential risks, and the rationale for each recommended step. The aim is to support informed decision-making and a shared plan of care rather than a single “cure.”

Takeaways for Patients and Clinicians

The pelvic ligaments and nerves contribute to a complex picture of lower back and pelvic pain. Nerve irritation can arise from mechanical instability, joint changes, or ligament tightness, and a careful, evidence-based assessment guides safe, individualized treatment. Collaboration among clinicians, therapists, and patients improves outcomes by combining education with targeted strategies. Even when a single structure seems implicated, a broader view that integrates the whole pelvic-lumbar system often yields the most reliable path to relief.

Next Steps

For clinicians, consider a structured assessment that integrates pelvic mechanics, neural pathways, and patient-reported symptoms, potentially coordinating with physical therapy and medical evaluation. For patients, discuss pelvic stability and nerve pathways with your clinician to learn about diagnostic steps and personalized treatment options. If you’re seeking further guidance, request a consultation to discuss a tailored evaluation plan that aligns with your goals and safety.

Pelvic Nerves and Ligaments in Lower Back Pain: Understanding Entrapment and Relief Strategies (Part 2) Read Post »

Treating low back pain
Spine

A Practical Approach to the Low Back: Targeting Fascia, Ligaments, and Tendinous Attachments (Part 3)

A Practical Approach to the Low Back: Targeting Fascia, Ligaments, and Tendinous Attachments (Part 3)

For clinicians who treat low back pain, a paradigm shift is underway: we can move beyond primarily targeting discs and nerves and toward understanding the fascia, ligaments, and muscle-tendon attachments that fundamentally stabilize the lumbar region. When we focus on these structures—the thoracolumbar fascia, attachments at the iliac crest, and the fascial connections surrounding the lumbar spine—we open up a broader, more effective set of diagnostic and therapeutic options. This approach helps explain why some patients who have failed epidurals or traditional corticosteroid therapies still improve with regenerative or targeted soft-tissue treatments. It also provides a framework for explaining to patients why pain may persist even when imaging looks relatively benign.

Begin with fascia as a central concept. The thoracolumbar fascia is more than a passive cover; it forms a critical plane that transmits forces between the abdominal wall, the back muscles, and the spine. Chronic tension in this fascia can create tugging forces at bony landmarks such as the iliac crest and the posterior lumbar region. Over time, sustained tension can lead to calcifications, microtears, or degenerative changes at attachments. When evaluating a patient, ask: Is there a pattern of midline or crest-located pain that worsens with movement or fascia-tension activities? Do imaging studies show calcifications or cystic changes near the crest or along the fascia’s paths? These clues guide you toward a management plan that includes addressing fascial integrity, not just nerve or disc pathology.

Understanding attachments matters because they are the sites where muscles and ligaments anchor to bone. The spine is a dynamic system: muscles attach to vertebrae, ligaments anchor to bone surfaces, and fascia blends between anterior and posterior structures. In the low back, these attachments can become symptomatic when tense, torn, or calcified. For example, the area around the iliac crest and lateral trochanter can show feathery calcifications on radiographs, which reflect long-standing attachment stress. These findings are not incidental; they point to mechanical drivers of pain that may respond to targeted regenerative or rehabilitative strategies. Ultrasound and advanced imaging help visualize these attachments and the fascia’s boundaries. By mapping these landmarks—iliac crests, spinous processes, transverse processes, and the sacral edges—you can guide injections or tissue-modifying therapies to the precise sites contributing to pain.

Another key piece is recognizing that pain generators in the low back are often overlapping. A patient’s pain may emanate from a combination of disc, facet joints, nerve structures, and soft-tissue attachments. When a steroid epidural fails to produce lasting relief, it’s a signal to reassess: could fascia or tendon-to-bone attachments be driving the pain? In these scenarios, therapies that target soft tissue—platelet-rich plasma (PRP), platelet-poor plasma (PPP), or stem-cell–based strategies—offer the potential to regenerate or repair damaged fascia and tendon interfaces. Early-stage evidence and clinical experience support the safety and utility of these approaches for soft tissue and ligamentous pathology, provided they are applied with careful patient selection and ultrasound guidance.

Practical steps to implement in your practice begin with a thorough but focused history and a biomechanical exam. Ask patients about activities that tension the thoracolumbar fascia—lifting, twisting, or sudden hip-flexor-dominant movements. Observe movement patterns and palpate along the crest, the transverse and spinous processes, and the posterior lumbar muscles for tenderness or bony wear. Use ultrasound not only to visualize soft tissue integrity but also to identify the fascia’s planes and attachment points. When you suspect fascial or attachment-driven pain, consider regenerative injections to the relevant fascial interfaces and tendon attachments. Platelet-rich products can be introduced to support tissue healing, while ensuring that you document responses carefully to build a personalized, iterative treatment plan.

In addition to regenerative approaches, don’t underestimate the value of foundational modalities: physical therapy focused on stabilizing the posterior elements, gradual loading strategies that promote tissue remodeling, and targeted manual therapies to restore fascial glide and reduce trigger points. A multimodal plan often yields the best outcomes because it addresses both the mechanical basis of pain and the tissue-level healing processes. If imaging or diagnostic blocks reveal that pain is driven by deeper structures, convert insights into a staged plan that escalates from conservative care to targeted interventions as needed. The overarching goal remains consistent: reduce pain, improve function, and restore durable mechanical health to the lumbar region.

Education is a critical companion to treatment. Help patients understand that the low back is a complex, integrated system, where fascia, muscles, ligaments, and bones all contribute to stability and movement. Framing pain within this network helps patients participate in a long-term plan rather than seeking a quick fix. Share the rationale for regenerative therapies and how they complement exercise, posture retraining, and ergonomic modifications. With proper patient education, you can set realistic expectations and improve adherence to a comprehensive treatment program.

As you advance this approach, you’ll gain a more nuanced map of the low back’s soft tissue architecture. You’ll be better equipped to select injection targets with ultrasound guidance, plan a staged treatment sequence, and combine regenerative therapies with rehabilitation to maximize outcomes. Although every patient is unique, the underlying principle remains universal: by healing the tissue interfaces—the fascia, ligaments, and tendon attachments that anchor the lumbar spine—you address the root mechanical drivers of pain and pave the way for lasting improvement.

A Practical Approach to the Low Back: Targeting Fascia, Ligaments, and Tendinous Attachments (Part 3) Read Post »

deliberate offset injections at the joint line
Lower Extremity

Deliberate Offset in Palpation-Guided Prolotherapy: Safe, Gradual Needle Progression (Part 1)

Deliberate Offset in Palpation-Guided Prolotherapy: Safe, Gradual Needle Progression (Part 1)

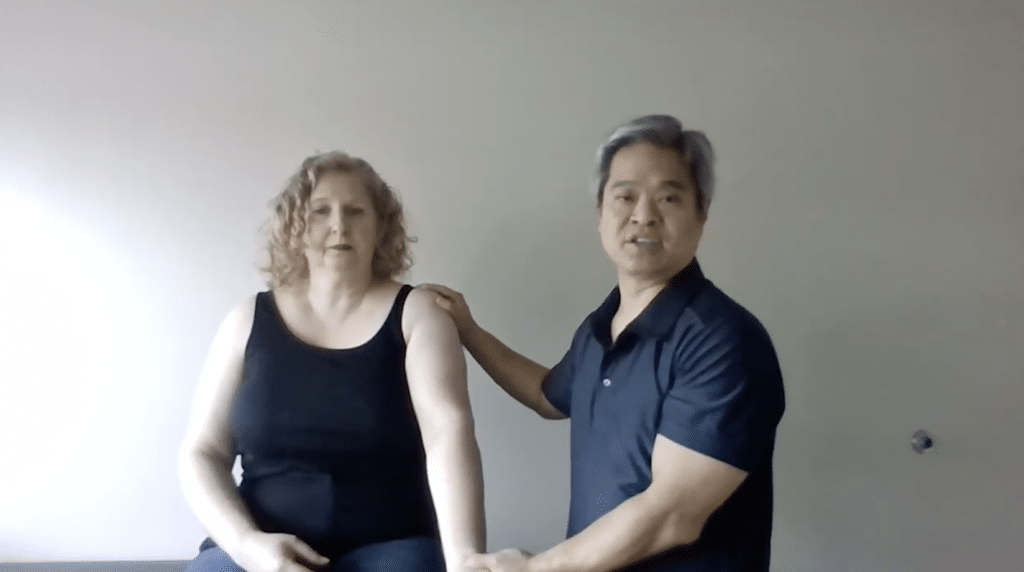
I’m Dr. David Wang from RPI, sharing a practical, clinician-focused approach to improving safety and accuracy in palpation-guided, non-image-guided prolotherapy injections. This is Part 1 of a two-part series designed to give you a robust framework you can apply in daily practice when navigating the shoulder’s upper joint without real-time imaging.

The central idea I want to convey is deliberate offset. This concept, borrowed from military training, helps you establish a reliable reference point when you don’t have an imaging modality guiding you. In injections around the shoulder, you often face a challenge: you’re unsure exactly where you are in relation to deep osseous landmarks and adjacent neurovascular structures. Deliberate offset asks you to take a controlled misdirection initially—move superficially or off-target by a small margin—so you can confirm your relative position against a known landmark before steering toward your actual target.

To illustrate, imagine your objective is the upper portion of the joint, with nearby neural structures as a cautionary reminder. You begin by entering at a very shallow angle, nearly parallel to the skin, deliberately avoiding bone on the first pass. This initial superficial pass tells you you’re safely above the surface and gives you a baseline for tissue depth. From there, you progressively increase the angle in small increments—five degrees at a time—while monitoring how much needle is exposed. A key cue is the needle’s depth: you’ll often notice the exposure decrease as you begin to approach the target plane, then suddenly plunge deeper once you cross a shallow-to-deep transition. That moment—the gummy sensation of the needle contacting deep tissue or bone—signals you’ve reached the correct osseous region for the prolotherapy injection.

This method has two powerful benefits. First, it provides a safer, more controlled path to a deep target, reducing the risk of accidentally traversing into neural foramina or misplacing the needle. Second, it offers a repeatable workflow across patients with different body habitus. By starting superficially and gradually offsetting deeper, you create a reliable, patient-specific trajectory that you can adjust in real time.

In the context of shoulder injections, the deliberate offset technique helps you localize the upper joint region with improved confidence. It’s particularly useful when landmarks are ambiguous or when you’re working near complex structures where precision matters for safety and efficacy. The technique is not a substitute for imaging guidance when it’s available, but it’s a valuable skill set for clinicians performing palpation-guided injections in regenerative medicine.

Click Here for Part 2

Deliberate Offset in Palpation-Guided Prolotherapy: Safe, Gradual Needle Progression (Part 1) Read Post »

deliberate offset prolotherapy
Lower Extremity

Advanced Deliberate Offset: Precision Palpation-Guided Injections at the Joint Line (Part 2)

Advanced Deliberate Offset: Precision Palpation-Guided Injections at the Joint Line (Part 2)

Continuing from Part 1, I’m Dr. David Wang of RPI, extending the deliberate offset technique with a more advanced application near the joint line. This installment demonstrates how to apply the same stepwise, controlled progression to another anatomical context—emphasizing safety and precision when working with small targets and nearby structures.

The premise remains the same: begin with a shallow entry to verify superficial anatomy, then incrementally deepen while maintaining a keen sense of needle depth and trajectory. In this example, the target is a small tibial structure just beneath the knee’s joint line. The medial joint line is a small, millimeter-scale target, often only a few millimeters long. Because the region houses several critical structures, accuracy is paramount, and image guidance is not always available in practice.

A crucial consideration is tissue thickness variability. The distance from skin to bone can range dramatically between patients, sometimes just a few millimeters and other times several centimeters. This variability makes it challenging to rely on a fixed depth or fixed degree-angle rule. Deliberate offset provides a flexible framework: you start superficially, progressively adjust depth and angle, and use tactile feedback—the “sonar” of the needle tip—to guide you to the target zone.

In this context, safety is the top priority. You’ll be navigating around structures such as the meniscus, cartilage, and fat pads. By offsetting initially and learning to feel when you’ve reached the correct layer, you minimize unnecessary needle passes and tissue trauma. The result is a safer, more efficient approach that can be adapted to various joints and targets beyond the shoulder.

If you’d like, I can format these posts for WordPress HTML blocks, add visuals, and provide a downloadable marking checklist to accompany the posts. And, as with Part 1, I’ll include an internal link back to Part 1 so readers can follow the full learning sequence.

Click Here for Part 1

Advanced Deliberate Offset: Precision Palpation-Guided Injections at the Joint Line (Part 2) Read Post »

Clinic Operations, Lower Extremity, Spine, Upper Extremity

Sharpening Ultrasound Skills for Spinal Injections: A Practical How-To for Providers

Sharpening Ultrasound Skills for Spinal Injections: A Practical How-To for Providers

Before you start scanning, clarify your goals. Identify the target anatomy for your planned injection—whether you’re aiming for the spinous process, lamina, facet joints, or transverse processes. Mapping out your needle trajectory and entry angles ahead of time helps you select the most appropriate transducer and scanning window. Establishing these parameters upfront sets the stage for a smoother, more precise procedure.

Transducer selection is central to this process. The curvilinear transducer, typically lower in frequency with a larger footprint, excels when target depth is a factor. For structures around five centimeters or deeper, it provides better penetration and a broader field of view, enabling you to visualize deep bony landmarks and the needle path with greater confidence. A key advantage of the curvilinear probe is its multi-angle sound-wave emission, which can improve visualization when you plan multiple needle angles during the injection.

By contrast, the linear transducer offers higher near-field resolution and is superb for superficial structures—roughly zero to four centimeters deep. It provides detailed visualization of the superficial bone cortex and soft tissue, which can be crucial for precise needle localization once the trajectory is established and the target lies within the near field. A practical approach is to start with curvilinear for depth and broad overview, then switch to linear for final needle advancement and fine-tuning in the near field.

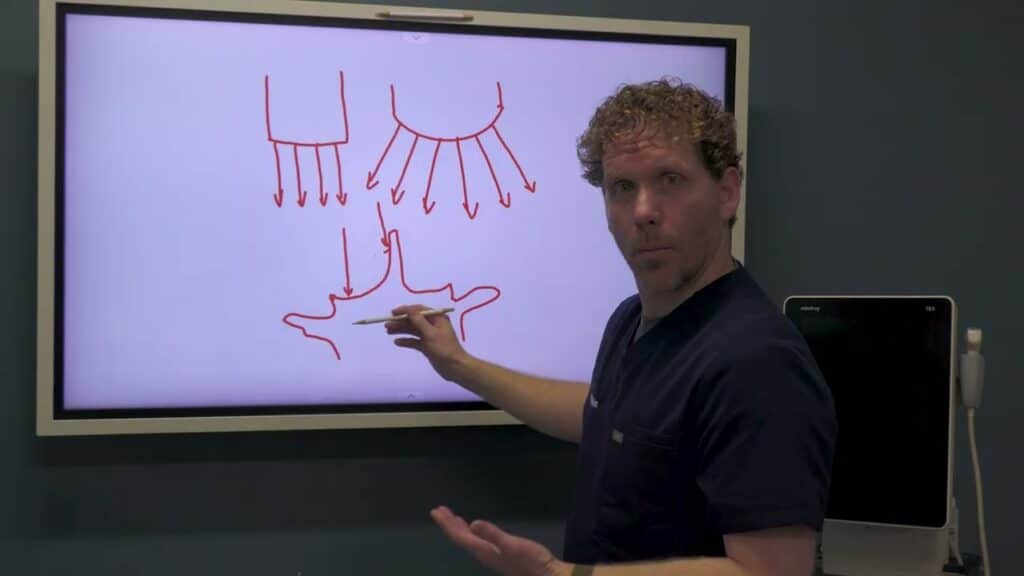
Imaging the spinal cortex and landmarks benefits from understanding how the angle of insonation affects reflection. Perpendicular insonation yields the brightest reflections from cortical bone, so position the transducer to maximize perpendicular impact on the spinous processes, lamina, and facet joints. With a curvilinear probe, you can take advantage of multiple incident angles to enhance visualization of complex anatomy and to track the needle when approaching from multiple directions. If you encounter artifact or shadowing, a small adjustment in angle or a gentle rock of the probe can optimize reflections from the cortical bone.

Transducer selection is more than a procedural backdrop; it’s a lever that can meaningfully improve accuracy, safety, and efficiency. By understanding the trade-offs between curvilinear and linear probes and applying deliberate imaging strategies, clinicians can elevate their ultrasound-guided spinal injections and deliver better patient care.


Sharpening Ultrasound Skills for Spinal Injections: A Practical How-To for Providers Read Post »

Upper Extremity

Mastering AC Joint Landmarking for Shoulder Injections: Part 1 — Common Errors and Corrections

Mastering AC Joint Landmarking for Shoulder Injections: Part 1 — Common Errors and Corrections

I’m Dr. David Wang from RPI, and I’m sharing a practical, clinician-focused guide to improve palpation-based landmarking for shoulder injections. This is Part 1 of a two-part series designed for orthopedic providers who want to translate palpable anatomy into accurate, safe injections around the clavicle and AC joint.

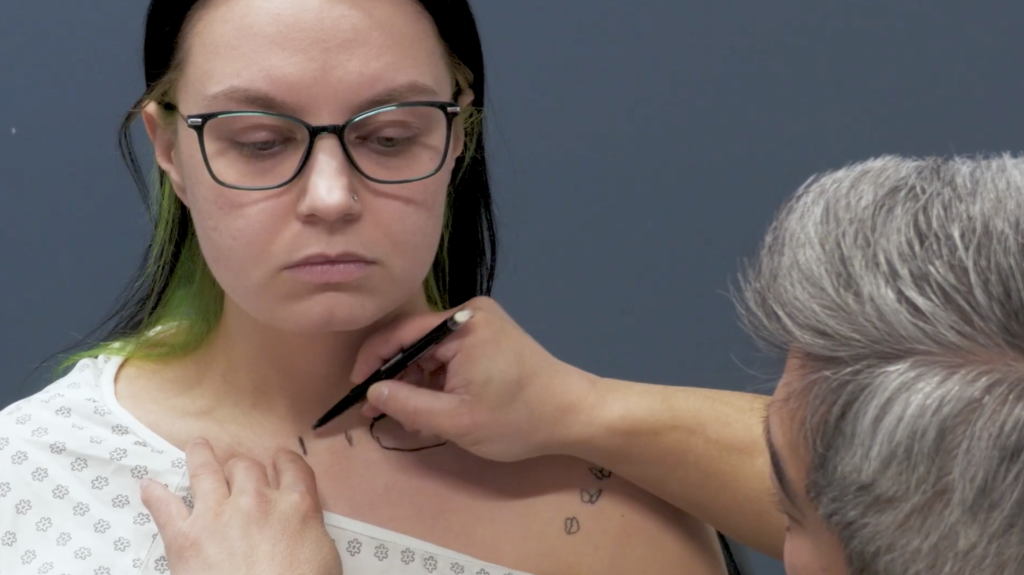
The shoulder region presents a challenging landscape for landmarks. The AC joint sits where the distal clavicle meets the acromion, but the superficial cues we rely on can be misleading. A frequent error I see is marking the sternoclavicular region or a lateral line in place of the true AC joint boundary. The sternoclavicular joint is near the sternal notch, a narrow landmark. When you place a line laterally across the shoulder to demarcate the AC joint, you risk overshooting medially or laterally, misaligning your subsequent injection plan. The sternal notch itself is relatively small, and it’s flanked by a clavicle that trails medially and laterally as it curves. Understanding this spatial relationship is essential for accurate injection targeting.

To avoid these missteps, I emphasize the concept of three divots around the AC area. The middle divot corresponds to the AC joint itself. The lateral divot marks the edge of the acromion, while the medial divot sits near the distal clavicle’s curvature. The challenge is that the distal clavicle is not a uniform edge; it has a subtle S-curve that transitions from a more cylindrical medial segment to a flatter distal segment. This curvature shifts the posterior border of the clavicle posteriorly, a detail that is easily masked by the trapezius muscle. If you rely on a straight-line approach to mark the clavicle, you’ll likely misplace the AC joint and, consequently, risk misdirecting your injection.

Another layer of complexity is distinguishing the coracoid process from the clavicle’s landmarks. The coracoid is a separate bony prominence, and confusing it with the medial clavicle can throw off your landmark map. Practically, I instruct residents and fellows to palpate with a purpose: identify the medial edge of the clavicle, then trace the clavicle’s S-curve toward the distal end, where it meets the V-shaped posterolateral corner. The V marks the termination of the clavicle and aligns with the AC joint line. This alignment is critical for planning injections near the superior labrum and adjacent structures.

With palpation alone, these landmarks can be elusive, particularly in patients with arthritic changes that alter bony margins. That’s why a robust mental map of distances helps: the midpoint of the AC joint is typically about two centimeters medial from the lateral edge of the acromion. This spatial rule of thumb provides a practical check when palpation feels uncertain. Even when the joint line isn’t easily palpable, knowing these relationships improves your odds of accurate injection localization.

In Part 2, we’ll move from landmark recognition to applying ultrasound guidance to refine our injections. We’ll describe a reproducible marking protocol that uses these landmarks, integrates with ultrasound visuals, and reduces tissue misplacement. If you’d like, I can tailor this content for a specific orthopedic subspecialty, or convert it into a workshop handout, diagram set, or printable marking checklist.

CLICK HERE FOR PART 2

Mastering AC Joint Landmarking for Shoulder Injections: Part 1 — Common Errors and Corrections Read Post »

Clinic Operations

Maximizing Regenerative Injectables: Why Post-Procedure Physical Therapy Matters

Maximizing Regenerative Injectables: Why Post-Procedure Physical Therapy Matters

I’m Dr. Eric Phillips of RPI, and I want to share a practical, patient-focused approach to regenerative medicine. In my view, the success of regenerative injections—whether prolotherapy, PRP, or stem cell treatments—depends as much on what happens after the procedure as on the procedure itself.

My core message is simple: after a regenerative injection, I aim to place patients into a structured physical therapy program within about a week. The rehab protocol I use is tailored to the specific area we’re treating—whether it’s a spine injection, a shoulder, a peripheral joint, or another region. The goal is to guide the body’s remodeling process through targeted therapy that complements the regenerative work we’ve done.

I don’t have in-house physical therapists in my practice, but I’ve built a strong network of skilled PT partners throughout the community. I educate these therapists about my protocols and frequently refer patients to them, while collaborating closely with their teams. This network creates a seamless continuum of care and ensures patients receive consistent, high-quality guidance throughout their rehab journey.

I talk to patients about the synergy of regenerative injections with physical therapy, describing it as a “one plus one equals three” dynamic. When rehab reinforces tissue remodeling and functional recovery, we’re more likely to achieve optimal outcomes. I also frame the rehab plan in terms of what patients have already invested—time, money, and discomfort—so I encourage them to stack the deck in their favor by committing to comprehensive post-procedural care.

Practically speaking, I advise clinicians to build relationships with local physical therapists, invite them into the practice ecosystem, and even host meetings or joint visits. A well-established PT network can reliably support patients before and after injections, which translates into stronger patient confidence, measurable progress, and higher satisfaction at follow-up visits.

If you’re considering regenerative treatments, I hope this approach helps you see why post-procedural rehabilitation is a critical component of success. A thoughtful rehab plan, backed by a trusted PT network, can significantly enhance outcomes.

Maximizing Regenerative Injectables: Why Post-Procedure Physical Therapy Matters Read Post »

Upper Extremity

Completing the Picture: Clavicle Landmarking, Curvature, and Safety for Shoulder Injections (Part 2)

Completing the Picture: Clavicle Landmarking, Curvature, and Safety for Shoulder Injections (Part 2)

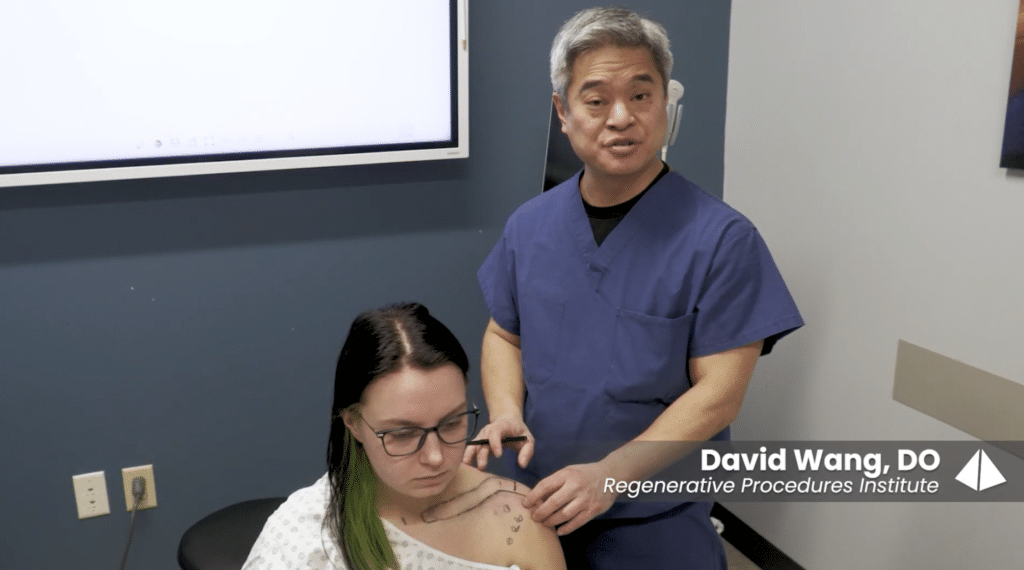
I’m Dr. David Wang of RPI, continuing our focused discussion on accurate palpation-based marking for shoulder injections. This installment zooms in on the clavicle’s curvature, the posterior border, and the V landmark—crucial for accurate, safe injections near the clavicle and superior shoulder region.

The clavicle is not a uniform cylinder. The medial aspect remains relatively rounded, while the lateral portion flattens and widens, creating a dynamic landmark landscape. The posterior border of the distal clavicle sits further back than learners expect, largely due to the overlying trapezius and the clavicle’s curved anatomy. When marking, it’s essential to preserve the clavicle’s natural S-curve and to identify the V-shaped posterolateral clavicle corner, which marks the entry point for superior injections toward the labrum.

A critical error to avoid is misidentifying the coracoid process as part of the clavicle. The coracoid is a distinct structure, and misidentifying it can derail marking accuracy. By maintaining awareness of the clavicle’s curvature and its posterior border, you’ll be better equipped to target the superior shoulder region safely and effectively. To implement this in practice, mark the medial clavicle edge that truly reflects the medial boundary, outline the S-curve and posterior border, and identify the V landmark that guides injections toward the labrum region. When used with ultrasound guidance, this approach improves accuracy and reduces tissue misplacement.

CLICK HERE FOR PART 1

Completing the Picture: Clavicle Landmarking, Curvature, and Safety for Shoulder Injections (Part 2) Read Post »

lumbar spine mechanics
Spine

Lumbar Biodynamics for Orthopedics: Posterior Stabilization with Ultrasound-Guided Injections

Lumbar Biodynamics for Orthopedics: Posterior Stabilization with Ultrasound-Guided Injections

I’m Dr. Eric Philippi of RPI, and I want to share a biomechanically informed perspective on the lumbar spine and how targeted injections can support posterior stability. This article is written for orthopedic providers—spine fellows, sports medicine specialists, interventional pain physicians—who want to translate lumbar biomechanics into actionable clinical practice.

The lumbar functional unit is more than a stack of vertebrae; it’s a dynamic system where each level interacts with the one above and below through vertebral bodies, discs, lamina, facet joints, and the posterior ligaments. In this context, biodynamics and the concept of “biotensegrity”—the posterior elements acting as stabilizers—offer a practical framework for understanding pain generators and guiding interventions.

A useful way to think about this is via the fulcrum analogy. The facet joints act as a central pivot, with the lamina and posterior ligaments providing stabilizing support. When posture deteriorates, repetitive strain, or acute trauma loosens these ligaments, the load distribution shifts. The result can be accelerated disc degeneration, facet arthropathy, and nerve irritation. My approach is to restore stability by delivering precise injections that reinforce the posterior spine and reduce mechanical stress on the discs and nerve roots.

In practice, I emphasize a targeted posterior approach under ultrasound or palpation guidance. The goal is to tighten and stabilize the posterior ligaments and elements to restore a more physiological lumbar lordosis and to relieve forward-directed pressure on the discs. By stabilizing the posterior aspects, we can potentially mitigate nerve compression and facet-related pain while preserving mobility. This is not about a one-size-fits-all solution; it’s about identifying which posterior structures contribute to instability in a given patient and choosing an injection strategy that addresses those components.

Ultrasound guidance plays a central role in this plan. It enhances our ability to visualize posterior spinal structures, confirm needle trajectory, and ensure accurate deposition around ligaments and joints. With ultrasound, we can verify that our target is reached without compromising nearby neural structures. The practical takeaway is to map the spine’s alignment, identify the posterior stabilizers, and then deliver a targeted injection that supports the spine’s natural biomechanics.

In designing a treatment course, consider how biodynamics informs patient selection. Patients with recurrent episodes of facet-related pain, subtle sagittal imbalance, or segmental instability may benefit from a posterior stabilization strategy. The injections themselves can help restore proprioceptive feedback and reduce inflammatory signaling within the posterior elements, potentially decreasing pain and improving function. That said, the success of this approach hinges on careful patient selection, precise technique, and thoughtful integration with rehabilitation.

A primer on this approach is also a reminder that biomechanics should inform not only injections but the broader care pathway. Imaging findings must be interpreted in the context of standing and dynamic spinal mechanics. When planning injections, I assess global alignment, segmental stability, and the contribution of posterior ligaments to load transfer. I view the spine as a cohesive unit, where restoring posterior stability can reduce strain on the discs and facets and support a more favorable healing environment.

As we prepare for ongoing education and conference discussions—such as insights into the biodynamics of the lumbar spine—this framework helps translate theory into practice. If you’re an orthopedic provider, consider how a biomechanical lens—focusing on stabilizing the posterior spine—might refine your patient selection, injections, and rehabilitation plans. It’s not only about relief of pain; it’s about restoring functional biomechanics to preserve mobility and quality of life.

Lumbar Biodynamics for Orthopedics: Posterior Stabilization with Ultrasound-Guided Injections Read Post »

Scroll to Top