October 15, 2025

Spine, Nerves

Thoracolumbar Fascia at the PSIS: Ultrasound Diagnosis and Injection Guide

Thoracolumbar Fascia at the PSIS: Ultrasound Diagnosis and Injection Guide

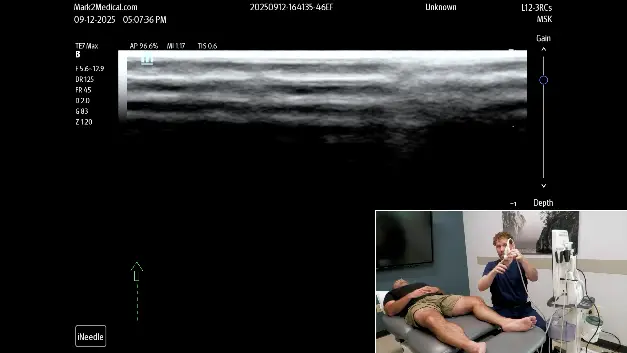
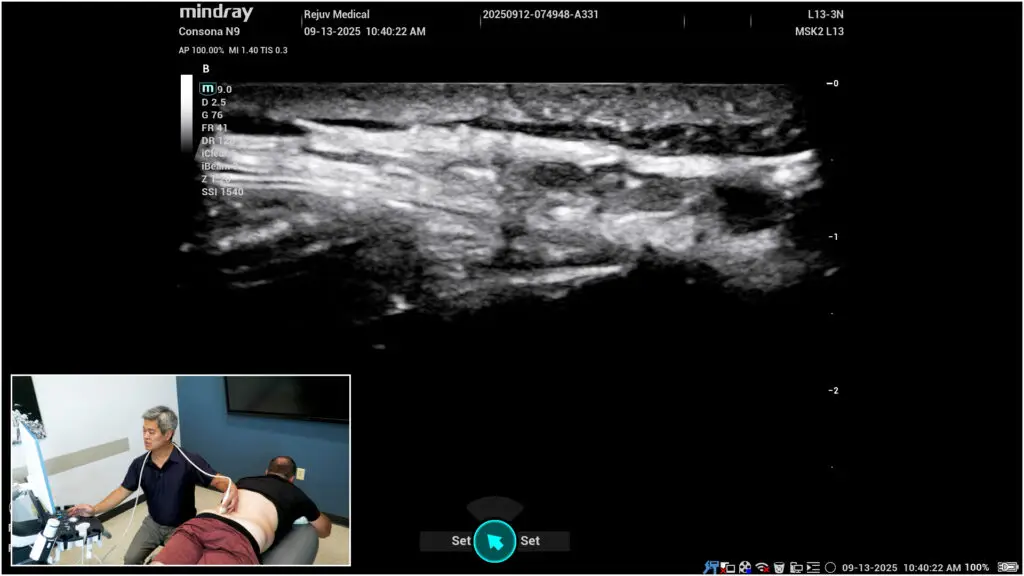
Axial low back pain that patients localize with a fingertip over one or both posterior superior iliac spines (PSIS) often implicates the thoracolumbar fascia (TLF). With ultrasound, you can reliably identify the PSIS, visualize both deep and superficial TLF bands, and target regenerative injections to the most pathologic tissue.

Clinical pattern

When asked, many patients point to “that spot” just over the PSIS on one or both sides. This aligns with the primary TLF attachment on the posterior-superior aspect of the ilium. Reproducible point tenderness here—especially with resisted trunk motions or prolonged standing—raises suspicion for TLF strain/degeneration.

Find the PSIS fast

If surface anatomy is challenging (e.g., higher BMI), use the thenar eminence as a broad palpation tool to locate the bony prominence. Set your fingertips where the thenar eminence lands to fine-tune position.

Ultrasound roadmap

1) Orient in transverse (short axis) to confirm PSIS.

  • On screen, set medial = right and lateral = left (match your machine conventions).
  • Identify the superficial PSIS cortex.

2) Deep band (long axis over the PSIS ridge).

  • Pivot to long axis so the PSIS cortex spans the screen.
  • Scan medially↔laterally to survey the deep TLF attachment.
  • Pathology clues: cortical irregularity, hypoechoic change at the enthesis, or loss of crisp fibrillar interfaces consistent with chronic strain/degeneration.
  • Injection: in-plane or out-of-plane tracking along the ridge where the deep band anchors.

3) Superficial band (rotate 60–90°).

  • Pivot the superficial end medially until a bright, thick, superficial band comes into view descending to the PSIS.
  • Pathology is often more frequent here: look for hypoechoic banding, focal calcific/enthesophyte change, or disrupted echotexture.
  • Sweep to capture the worst segment—many patients show maximal findings slightly lateral to midline.

Injection technique pearls

  • Target the most abnormal segment (superficial more often symptomatic); treat the deep band when cortical irregularity/hypoechogenicity is prominent at the ridge.
  • Keep the needle in-plane when feasible for precise deposition; use small test volumes to confirm plane/spread.
  • Hydrodissect along the diseased layer to restore glide, then deliver your chosen regenerative solution (e.g., dextrose, PRP) into the fascial plane/enthesis.
  • Avoid intratendinous spread into adjacent gluteal or paraspinal tendons unless intentionally treating them.
  • Combine with a load-management plan (hip hinge mechanics, posterior chain strength, lumbopelvic stabilization) to reduce recurrence.

Why this matters

The PSIS-level TLF is a high-yield pain generator in axial LBP and often overlooked when imaging focuses only on discs or facet joints. Systematic ultrasound evaluation of deep vs superficial bands lets you localize pathology and treat precisely, often producing meaningful relief in patients who’ve “tried everything.”

Thoracolumbar Fascia at the PSIS: Ultrasound Diagnosis and Injection Guide Read Post »
Spine, Clinic Operations, Lower Extremity, Nerves, Upper Extremity

Ultrasound-Guided Needling: A Stepwise Technique You Can Trust

Ultrasound-Guided Needling: A Stepwise Technique You Can Trust

Ultrasound guidance can take injections from “good enough” to precise, safe, and reproducible—especially near small targets like nerves. This quick guide distills a stepwise approach you can apply immediately in clinic.

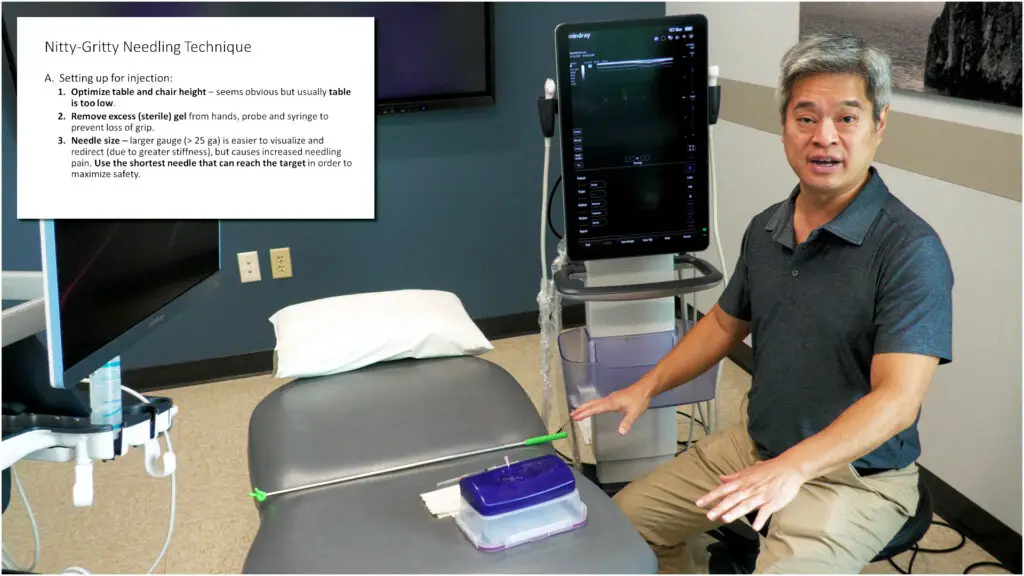
1) Set up before you scan

  • Ergonomics first: Adjust table/chair height so a shallow in-plane angle feels natural. If the table is too low, you’ll default to a steep, hard-to-control trajectory.
  • De-gel for control: Diagnostic scans love extra gel; injections do not. Wipe probe, hands, and syringe so you can make micro-movements without slipping.
  • Right tools: Prefer the shortest needle that reaches the target. Use smaller gauges (e.g., 25G) for patient comfort as your skill grows. Match syringe size to control—smaller barrels are easier to finesse; learn alternate grips for stability and continuous injection.

2) Master the probe hold (micro-moves matter)

Use a three-finger wrap high on the probe with the 4th/5th fingers resting on the patient. This balances stability with mobility, enabling all five motion families (slide long/short axis, rotate, tilt, heel-toe) in tiny increments. Flex the wrist—this “intentional discomfort” increases leverage and fine control.

3) Line up like a pool cue

Before inserting the needle, align patient → target → probe → injecting hand → eyes → screen. Keep the second monitor low enough that you glance with your eyes, not your neck. Minimize skin-to-target distance: position the probe so your path is short and your needle can stay shallow.

4) Geometry beats guesswork

  • Depth decides angle. Estimate target depth and pick an initial angle (e.g., ~30–45°) relative to the probe, not the room. If you tilt the probe (to fight anisotropy), adjust needle angle to match.
  • Stand off the footprint. Avoid inserting right against the probe—maintain room to pivot and protect the transducer.

5) Keep the needle in view (and prove it’s the tip)

Three visualization boosters:

  1. Heel-toe toward the needle to make the beam more perpendicular—needle brightens dramatically.
  2. Oscillate the needle (tiny in-out “sewing” motion) while keeping net depth unchanged.
  3. Lateral sweep the probe ~5 mm each way—like radar—to pass over the true tip.
    Safety check: the on-screen motion of the tip must match your hand movement; if not, you’re probably seeing shaft, not tip.

6) Correct deliberately—don’t “fish”

If you’re off target, retract almost to skin, adjust angle, then re-advance. Don’t bend the needle by steering while deep. Frequently look at your hands to ensure the probe is centered over the needle path (dominant-hand drift is common). Break contact points if needed—another moment of intentional discomfort that prevents hidden angle changes.

7) Progress thoughtfully

Skill progression runs: safe → effective → minimal pain → efficient → effortless. Smaller needles, fewer redirects, and consistent visualization take thousands of iterations—but they spare patients bruising and you frustration.

Ultrasound-Guided Needling: A Stepwise Technique You Can Trust Read Post »

Clinic Operations, Nerves

Ultrasound Depth Settings for Safer, Cleaner Injections

Ultrasound Depth Settings for Safer, Cleaner Injections

Depth is one of the first—and most important—settings to optimize when performing ultrasound-guided injections. Set it too shallow and you’ll lose critical lateral information; too deep and you sacrifice resolution. Here’s a simple, repeatable approach using the medial ankle (posterior tibial nerve at the medial malleolus) to get your depth right before you ever pick up a needle.

Why Depth Matters

On many machines, changing depth doesn’t just alter how far you see—it also changes how much of the probe footprint is represented on screen. With overly shallow depth, the image can stop reflecting the full lateral edges of the transducer. That creates a dangerous mismatch: you think the screen shows “everything under the probe,” but the true footprint extends beyond what’s visible. Result: a needle can travel off-screen (e.g., toward the Achilles) even though it’s still beneath the probe.

The Setup: Medial Malleolus Window

Short-axis view between the medial malleolus (bone/cortical shadow) and Achilles tendon:


      • Identify posterior tibial artery and paired veins (veins collapse with gentle compression; artery stays patent/pulsatile).

      • Find the posterior tibial nerve (oval/round, honeycomb fascicles with hyperechoic epineurium).

      • If there’s an air gap between malleolus and Achilles, flood the space with gel (standoff) rather than pressing harder.

    The Depth Drill (Before You Inject)


        1. Start shallow, then watch the left/right edges of the image as you step the depth deeper one click at a time.

        1. Confirm full footprint capture: As you increase depth, there’s a point where the image gets wider (more of the probe footprint is now represented). Keep stepping deeper until additional depth no longer widens the image—then back off one click so you maintain resolution while still visualizing the entire footprint.

        1. Landmarks visible: At your working depth, you should see the medial malleolus cortex, Achilles margin, artery/veins, and the tibial nerve—all within the on-screen field.

        1. Angle of approach: If your injection is in-plane from posterior → anterior, confirm that the entry corner of the probe corresponds to on-screen edge. With full-footprint visualization, your needle should appear as soon as it passes the skin and remain visible to the tip.

      Safety Pearls


          • Never chase a missing needle by advancing blindly. If the tip disappears, stop, re-optimize depth/angle, and re-approach.

          • Use anisotropy to brighten the nerve (tilt the transducer a few degrees in either direction).

          • Hydrodissect with a small test bolus to confirm perineural spread; avoid intraneural resistance or swelling.

          • Machine-specific sweet spot: On some systems, that “full-footprint” depth might be ~2.5–3.0 cm for this ankle window. Test on your unit (and each probe) so you know the threshold before procedures.

        Common Pitfalls


            • Too shallow: Great nerve detail but truncated lateral field—needle can go off-screen under the same probe.

            • Too deep: Entire footprint visible, but resolution suffers and small targets are harder to see.

            • Over-compression: Distorts tissue, collapses veins, and hides the plane you intend to inject.

          Bottom Line

          Pick a depth that captures the full probe footprint while preserving enough resolution to track the needle tip. Do this first, every time, and your injections will be safer, cleaner, and more predictable.

          Ultrasound Depth Settings for Safer, Cleaner Injections Read Post »

          Clinic Operations, Marketing

          The 5-Minute Consult: Patient Education That Drives Outcomes

          The 5-Minute Consult: Patient Education That Drives Outcomes

          Great procedures start with great conversations. When knee pain patients arrive already “pre-sold” by a friend’s success, your job is to connect clear diagnostics with an ethical, evidence-based plan they understand—and can act on. Here’s a fast, reproducible flow you can use at the end of your visit to align expectations, reduce fear, and map next steps.

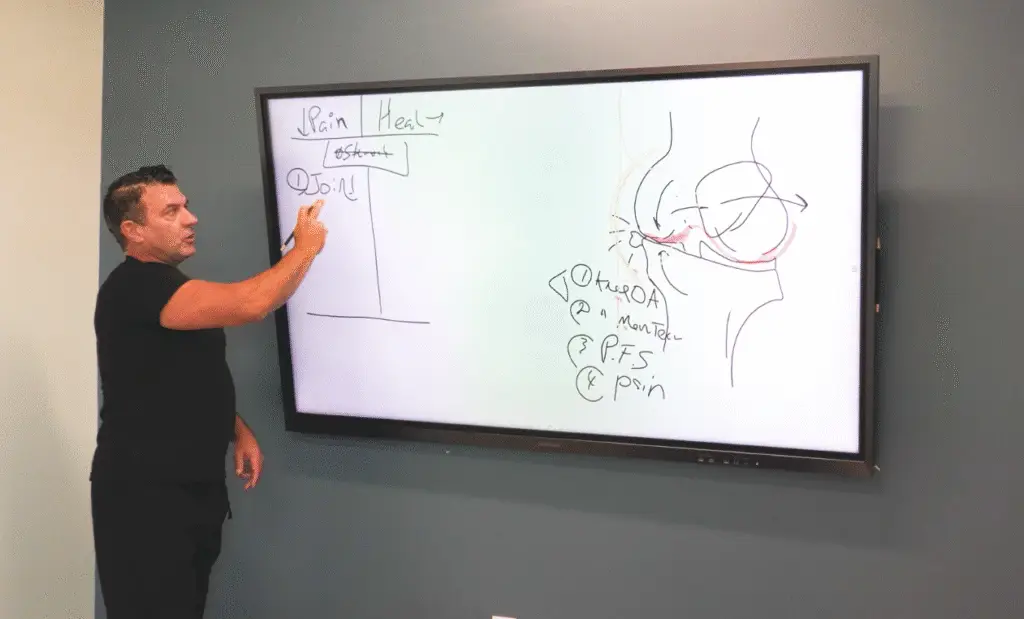
          1) Make the invisible visible

          Use a whiteboard, tablet, or smart board. Sketch the hinge joint, label medial and lateral compartments, and mark the patient’s pain zone. Briefly show how cartilage loss, a partially resected/extruded medial meniscus, patellar maltracking, and MCL laxity create abnormal loading. Patients remember pictures.

          2) Synthesize the findings

          Tie history, exam, ultrasound, and X-ray into three or four clear diagnoses:

          • Knee osteoarthritis (cartilage thinning + risk factors)
          • Medial meniscal pathology (tears/extrusion; not currently locking → likely nonsurgical)
          • Patellofemoral maltracking (lateral tracking, anterior knee pain)
          • Neuropathic contributors (periarticular genicular/saphenous branches can amplify pain)

          Explain that nerves modulate pain and healing; if you ignore them, you may undertreat.

          3) Set treatment goals (pain now vs healing later)

          Patients want to move, travel, and sleep. State two parallel aims:

          • Reduce pain now to enable activity and PT
          • Improve tissue environment for longer-term function

          4) Present the ladder of options

          Avoid rushing to surgery or high-dose steroids (discuss risks and cartilage effects).

          A. Low-risk relief

          • Dextrose (D5W) perineural “nerve reset” around symptomatic branches
          • Intra-articular dextrose for joint pain modulation

          B. Insurance-covered adjuncts

          • Viscosupplementation (“lube job”) when criteria met (often requires ~4 PT sessions)
          • Targeted PT for tracking and strength (VMO, hip abductors/ERs)
          • Unloader brace to open the medial compartment during activity and during post-procedure protection

          C. Regenerative options (orthobiologics)

          • PRP (platelet concentrate as the “fertilizer” for healing signals)
          • Bone marrow–derived cell therapy (the “seed”); often combined with PRP for synergy
            Set expectations, discuss indications/contraindications, and review evidence you provide in take-home materials.

          5) Optimize the terrain

          Address modifiable risks that blunt outcomes:

          • Hormonal status (e.g., menopause): consider functional medicine consult and labs
          • Supplements with supportive evidence (e.g., omega-3, turmeric, vitamin D/C) and dosing sheet
          • Load management (brace use, graded activity)

          6) Close with a clear plan + follow-through

          Number your handouts (1–4), summarize in one minute, and schedule:

          • Today: nerve/joint pain modulation; brace fitting; PT referral
          • Next 1–2 weeks: insurance steps, functional medicine consult, supplements
          • 5–6 weeks: reassess; consider PRP/BMAC based on response and goals

          Reinforce via automated email/SMS (testimonials, steroid education, procedure FAQs). Use an AI scribe to capture your narrative as you teach—the same words educate the patient and build a clean chart.

          Bottom line

          Show the problem, name the drivers (joint + nerve + mechanics), and offer a stepped plan that relieves pain now while creating the conditions for healing. Patients feel heard, you set realistic expectations, and your procedures work better.

          The 5-Minute Consult: Patient Education That Drives Outcomes Read Post »

          Scroll to Top